Elegoo Neptune 4 Review: Invisible Klipper
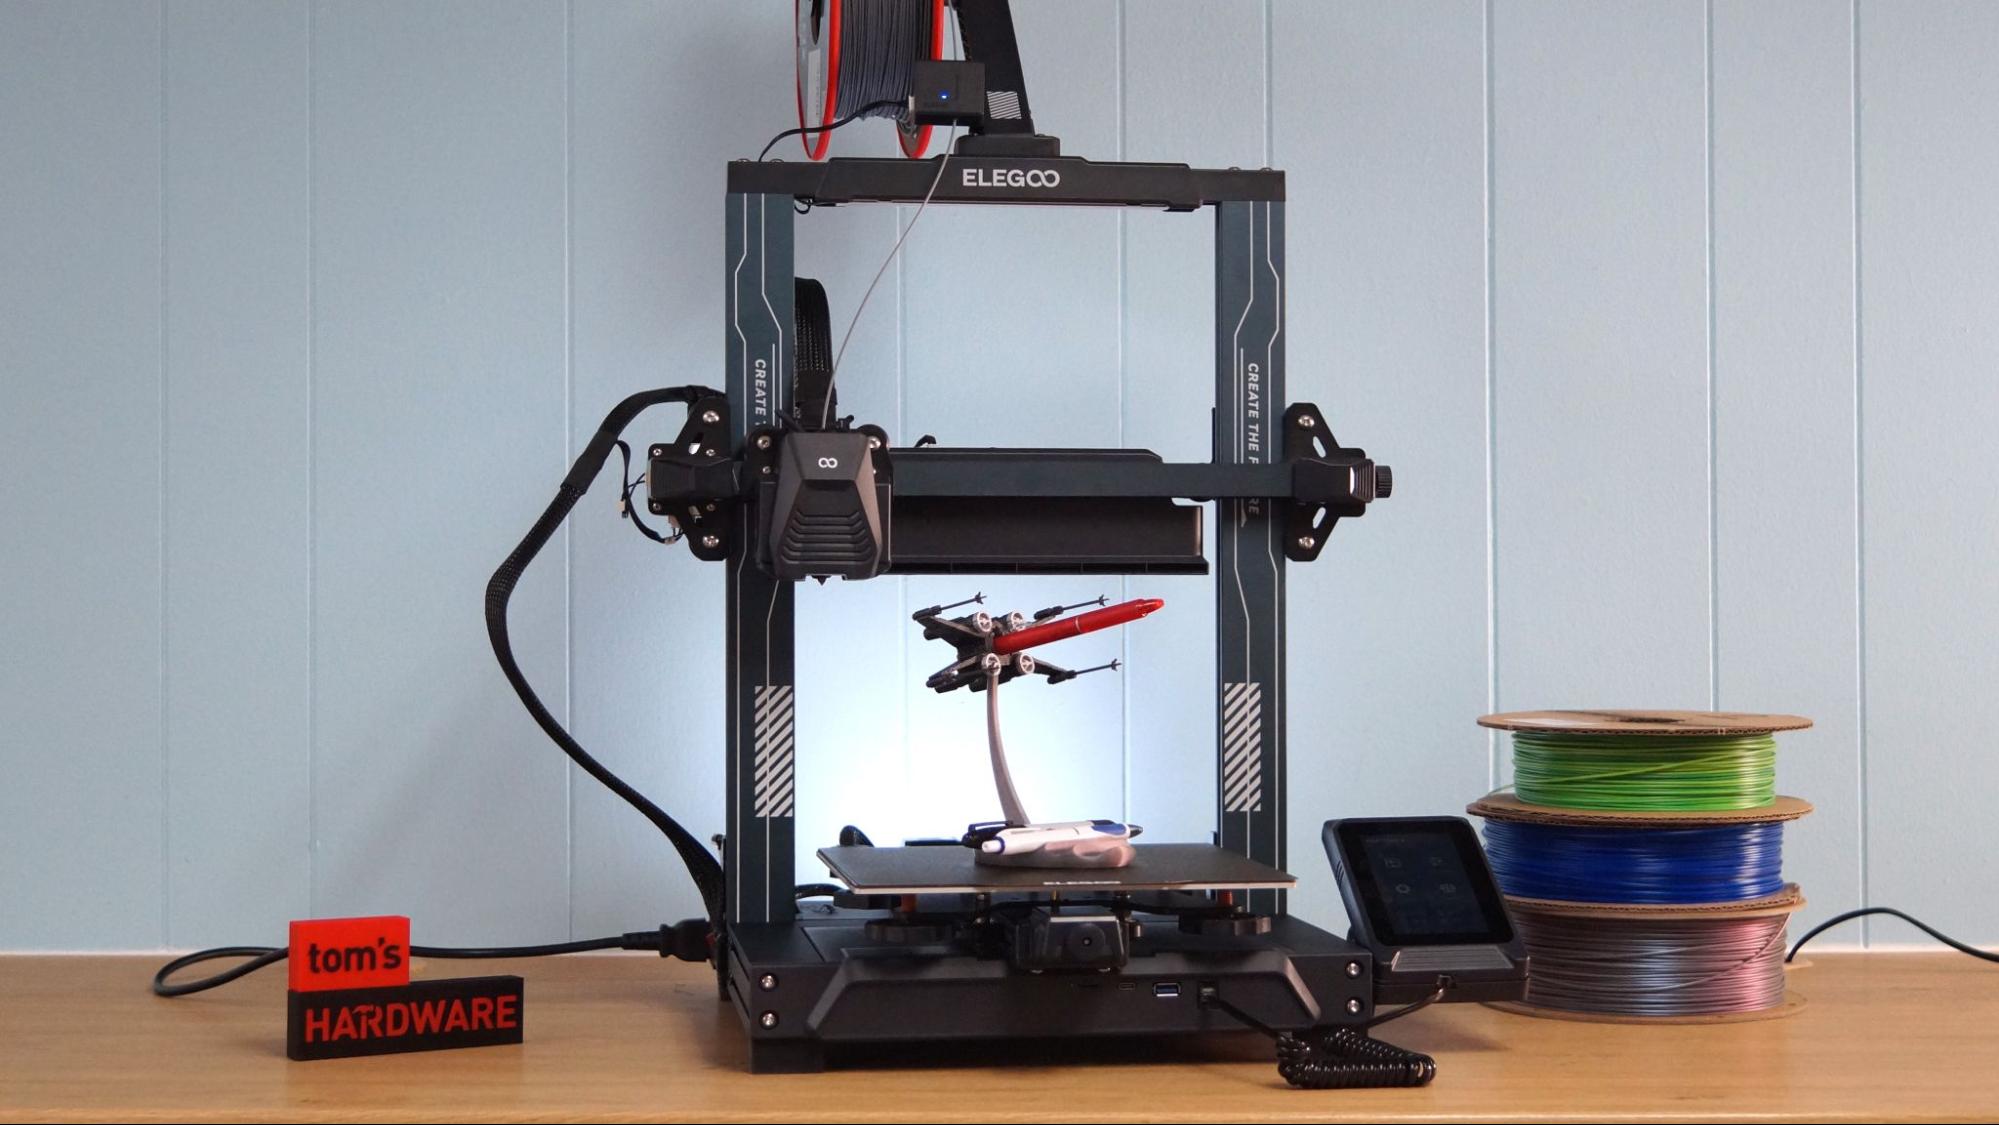
Elegoo has entered the race for speed with a much faster version of their popular Neptune 3 Pro, The Neptune 4. It has improved speed thanks to a hidden install of Klipper firmware, plus everything that made the Neptune 3 Pro our favorite 3D printer for beginners.
Currently priced at $259, the Neptune 4 is quite a bargain in the field of fast printing. However, the way Elegoo chose to integrate Klipper is confounding. It’s hidden in the background, granting the user speed while making its other perks difficult to access. The hands-off approach might work fine for complete beginners, but if you want to poke under the hood you’ll have to find a long enough Ethernet cable to reach your router or take a leap of faith on finding a compatible WiFi dongle.
There’s still a lot to love about the Neptune 4. It arrives 90% pre-assembled, making it a quick build. It has dual Z axis, a grippy direct drive that handles TPU like a champ, a high flow nozzle rated to 300 degrees, a giant cooling fan and an easy to navigate touch screen. It even has an LED light on the gantry.
Leveling has taken a step backwards. Though it’s still very good, it’s adopted a more tedious manual + auto leveling system. It’s not too surprising that Elegoo didn’t include an accelerometer for tuning input shaping, but there’s no visible way to hook one up either. A beginner won’t see this as a failing, as the factory settings are really quite good. However, this is the kind of feature a more seasoned maker will sorely miss.
Specifications: Elegoo Neptune 4
| Build Volume | 225 x 225 x 265 mm (8.5 x 8.5 x 10.4 inches) |
| Material | PLA/PETG/TPU (up to 300 degrees) |
| Extruder Type | Direct Drive |
| Nozzle | .4 high flow |
| Build Platform | PEI textured spring steel sheet heated |
| Bed Leveling | Automatic, Inductive probe |
| Filament Runout Sensor | Yes |
| Connectivity | USB, LAN |
| Interface | Color touch screen, removable |
| Machine Footprint | 475*445*515 (18.7 x 17.5 x 20.3 in) |
| Machine Weight | 8.3 KG (18.3 lbs) |
Elegoo Neptune 4: Included in the Box
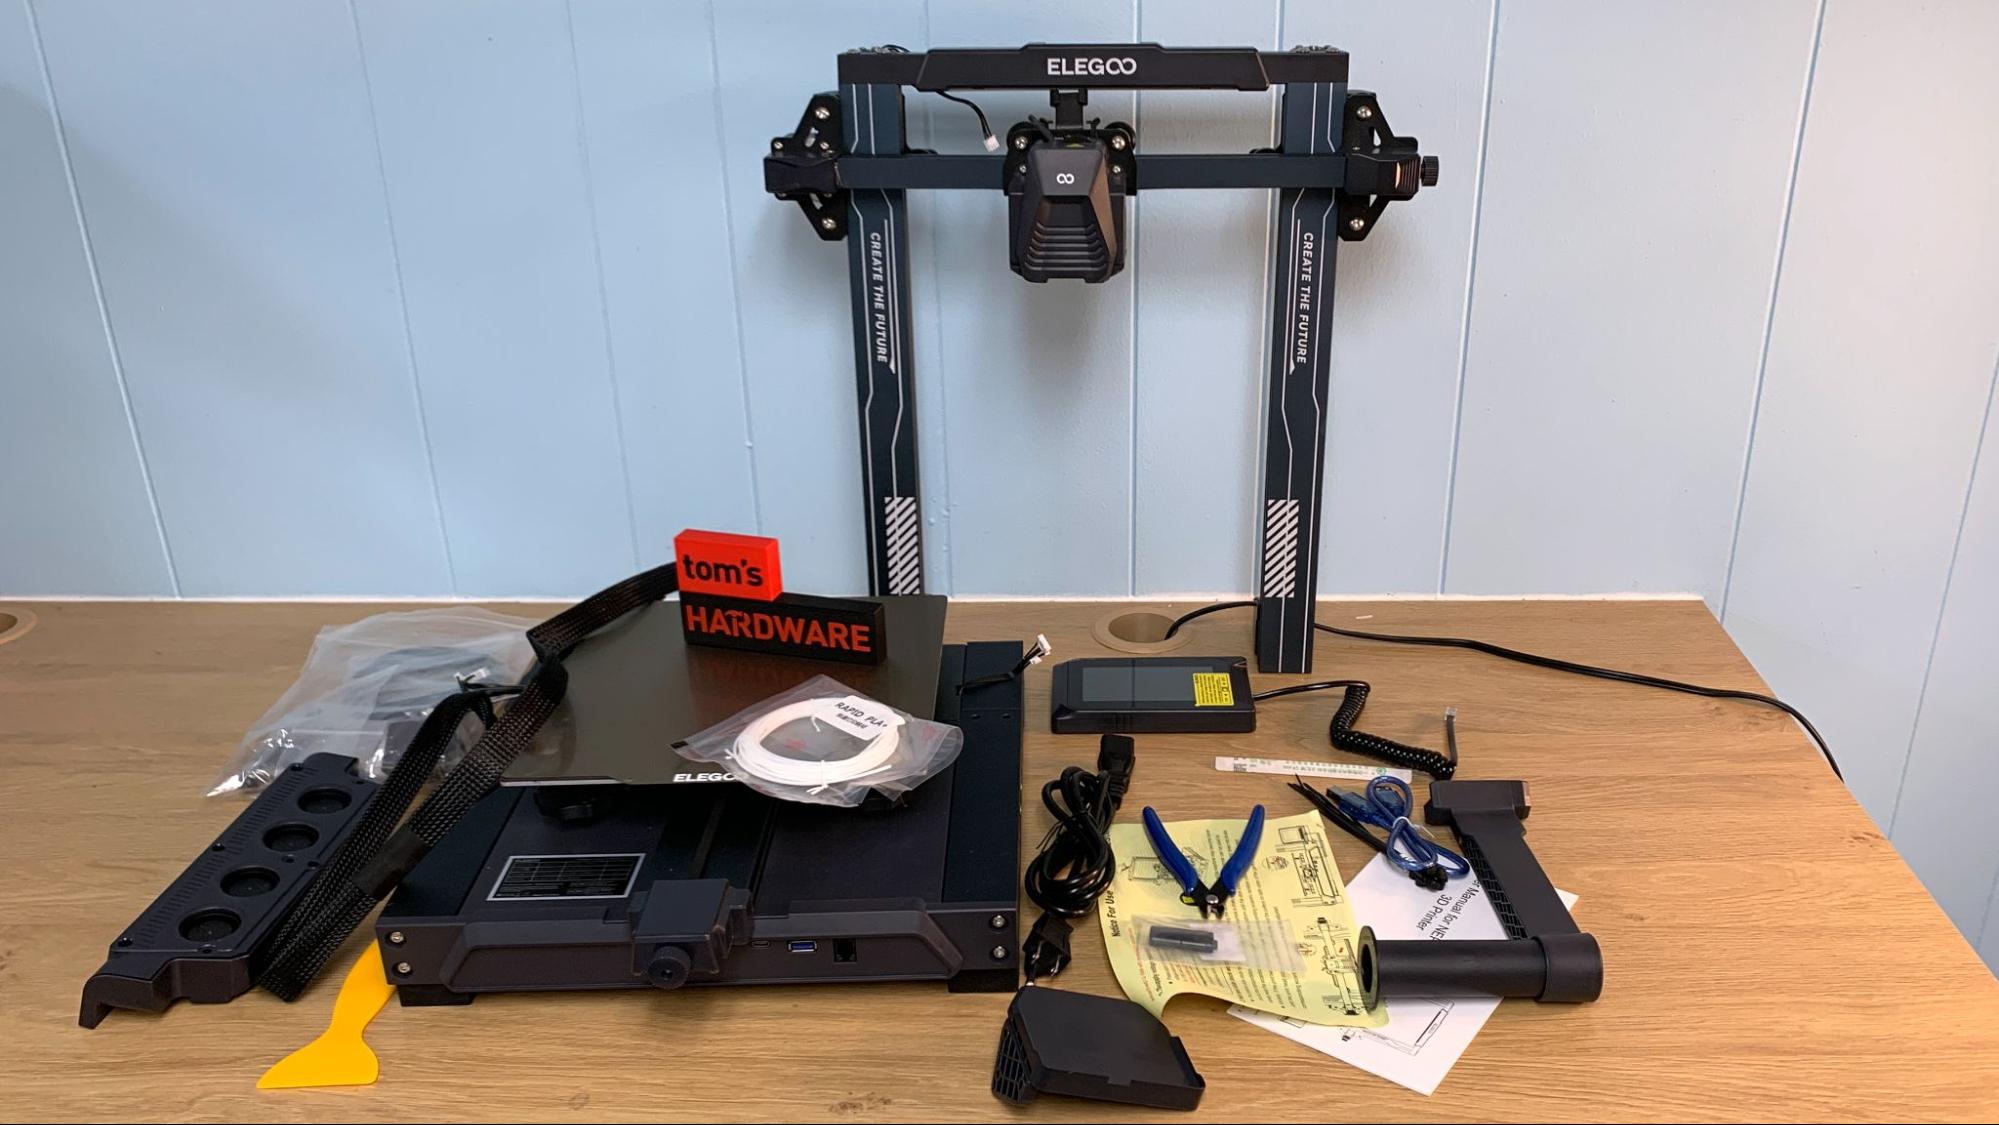
The Neptune 4 comes with everything you need to get your printer set up. You get tools to build and maintain the printer, side cutters, a plastic scraper, 2 spare nozzles, and a USB stick. There’s also a small sample of white PLA to print your first model.
The USB stick has a very helpful short video on assembling the printer. You also get a PDF copy of the manual, a copy of Elegoo Cura and a sample model in both pre-sliced .gcode and .stl format.
Design of the Elegoo Neptune 4
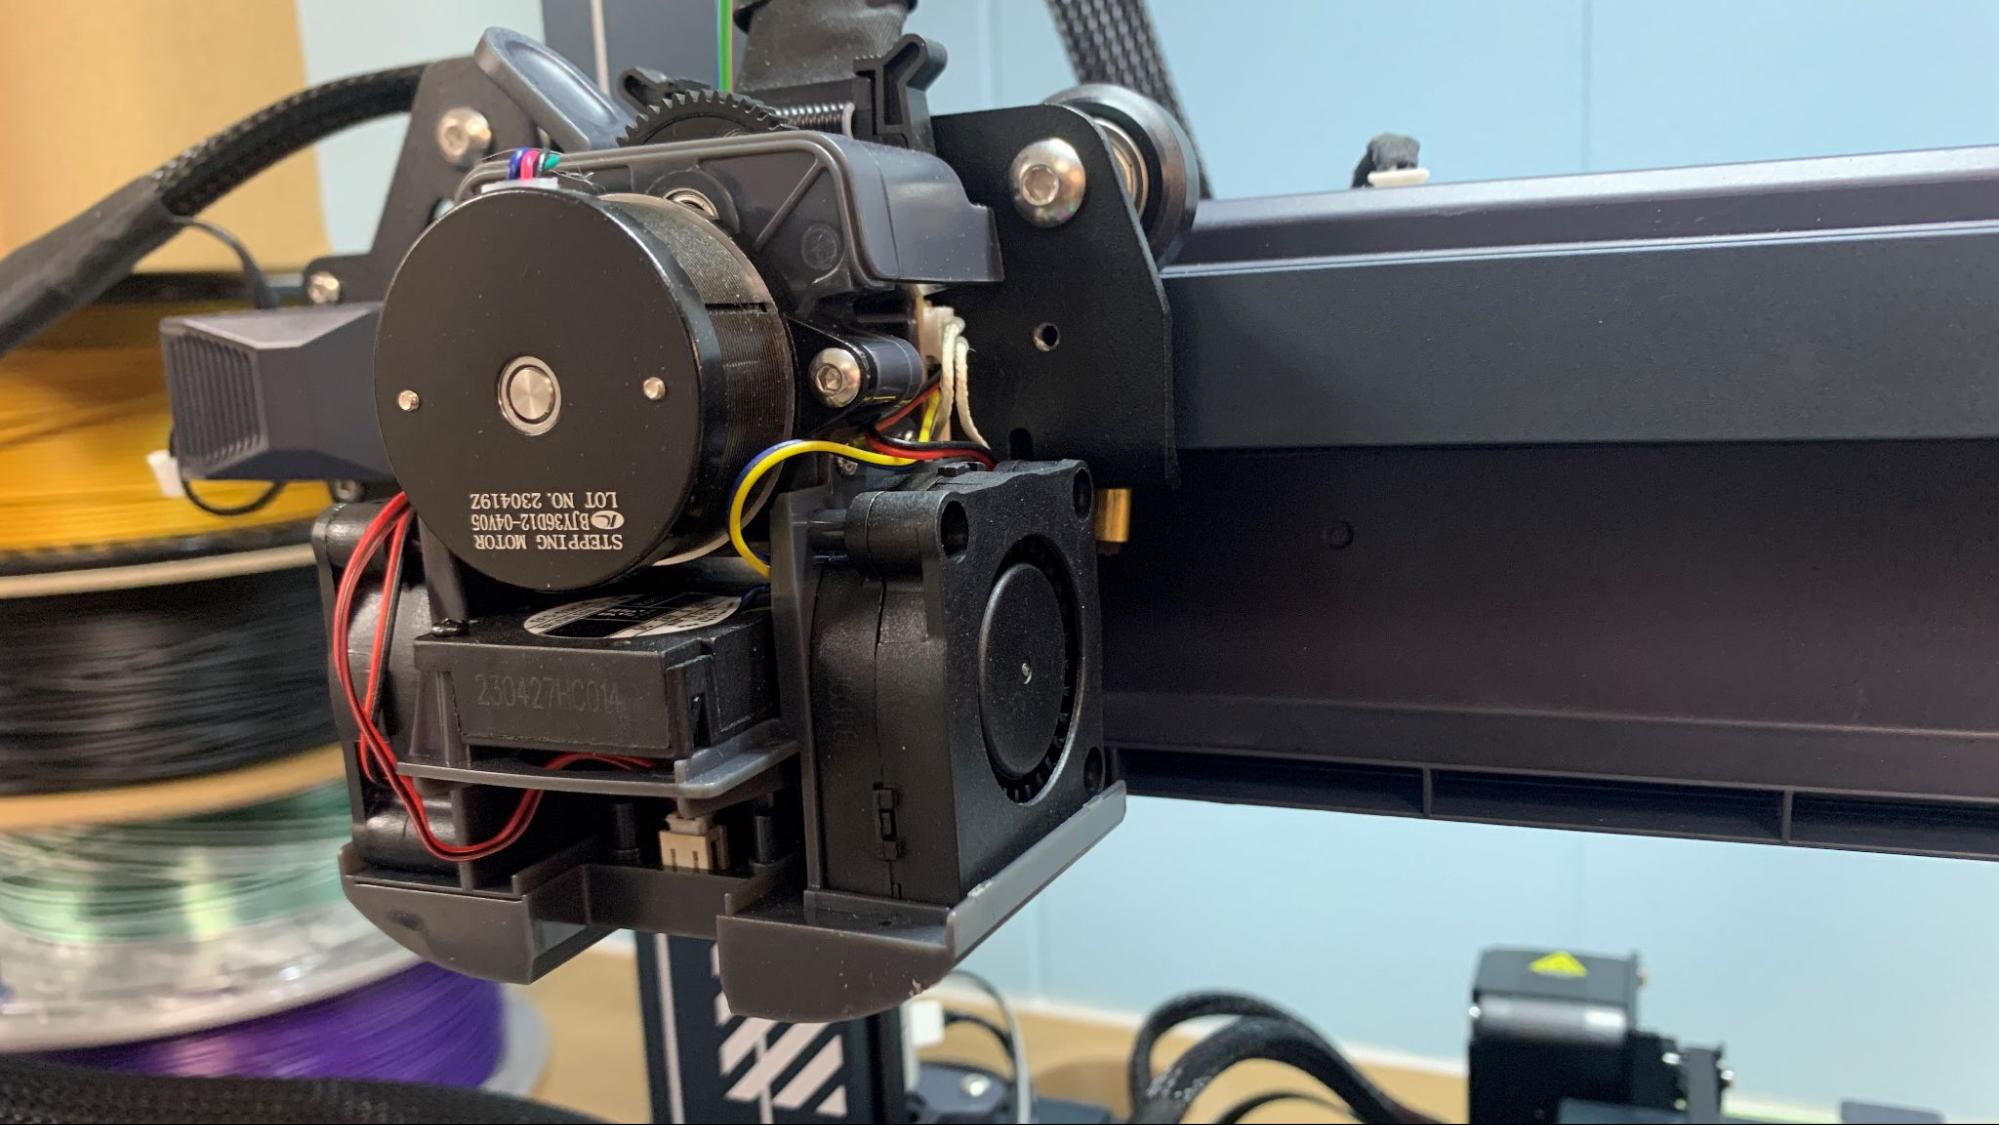
The Neptune 4 looks exactly like the Neptune 3…with the addition of a huge cooling fan bolted to the back of the X gantry. The gray aluminum with white detailing and “Create the Future” motto is still fairly distinctive from any other brand on the market.
There are few improvements over the third iteration – the fans now spin on ball bearings and leveling can tap 121 points. The dual-gear direct drive is lighter weight with a bigger gear: a 5.2 to 1 ratio rather than 3 to 1. The hotend also boasts a copper-titanium all-metal throat for more efficient heating.
The giant cooling fan on the gantry is made up of four 4020 ball bearing fans. It’s pointed right below the nozzle and does a good job of cooling the just printed layer extremely fast. If you don’t need to print at supersonic speeds, you can switch off the bonus fan. It’s also fairly loud, but I’ve yet to find a high speed printer that wasn’t loud.
In case you’re not familiar with the Neptune 3 Pro, this one shares the same dual Z axis with a synchronizing belt at the top. The large removable touchpad with a magnetic base is the same, as is that curly landline style cord. Personally, I never take the touchpad off, but if you’ve got a problem with glare I can see it coming in handy.
What’s more intriguing than the screen is what’s on it. It looks very much like the Neptune 3 Pro, a printer with traditional Marlin firmware, not Klipper. I’ve reviewed several printers running Klipper and the best ones have adopted KlipperScreen, which gives you more features. It seems that Elegoo decided the best way to run Klipper is to not see it at all.
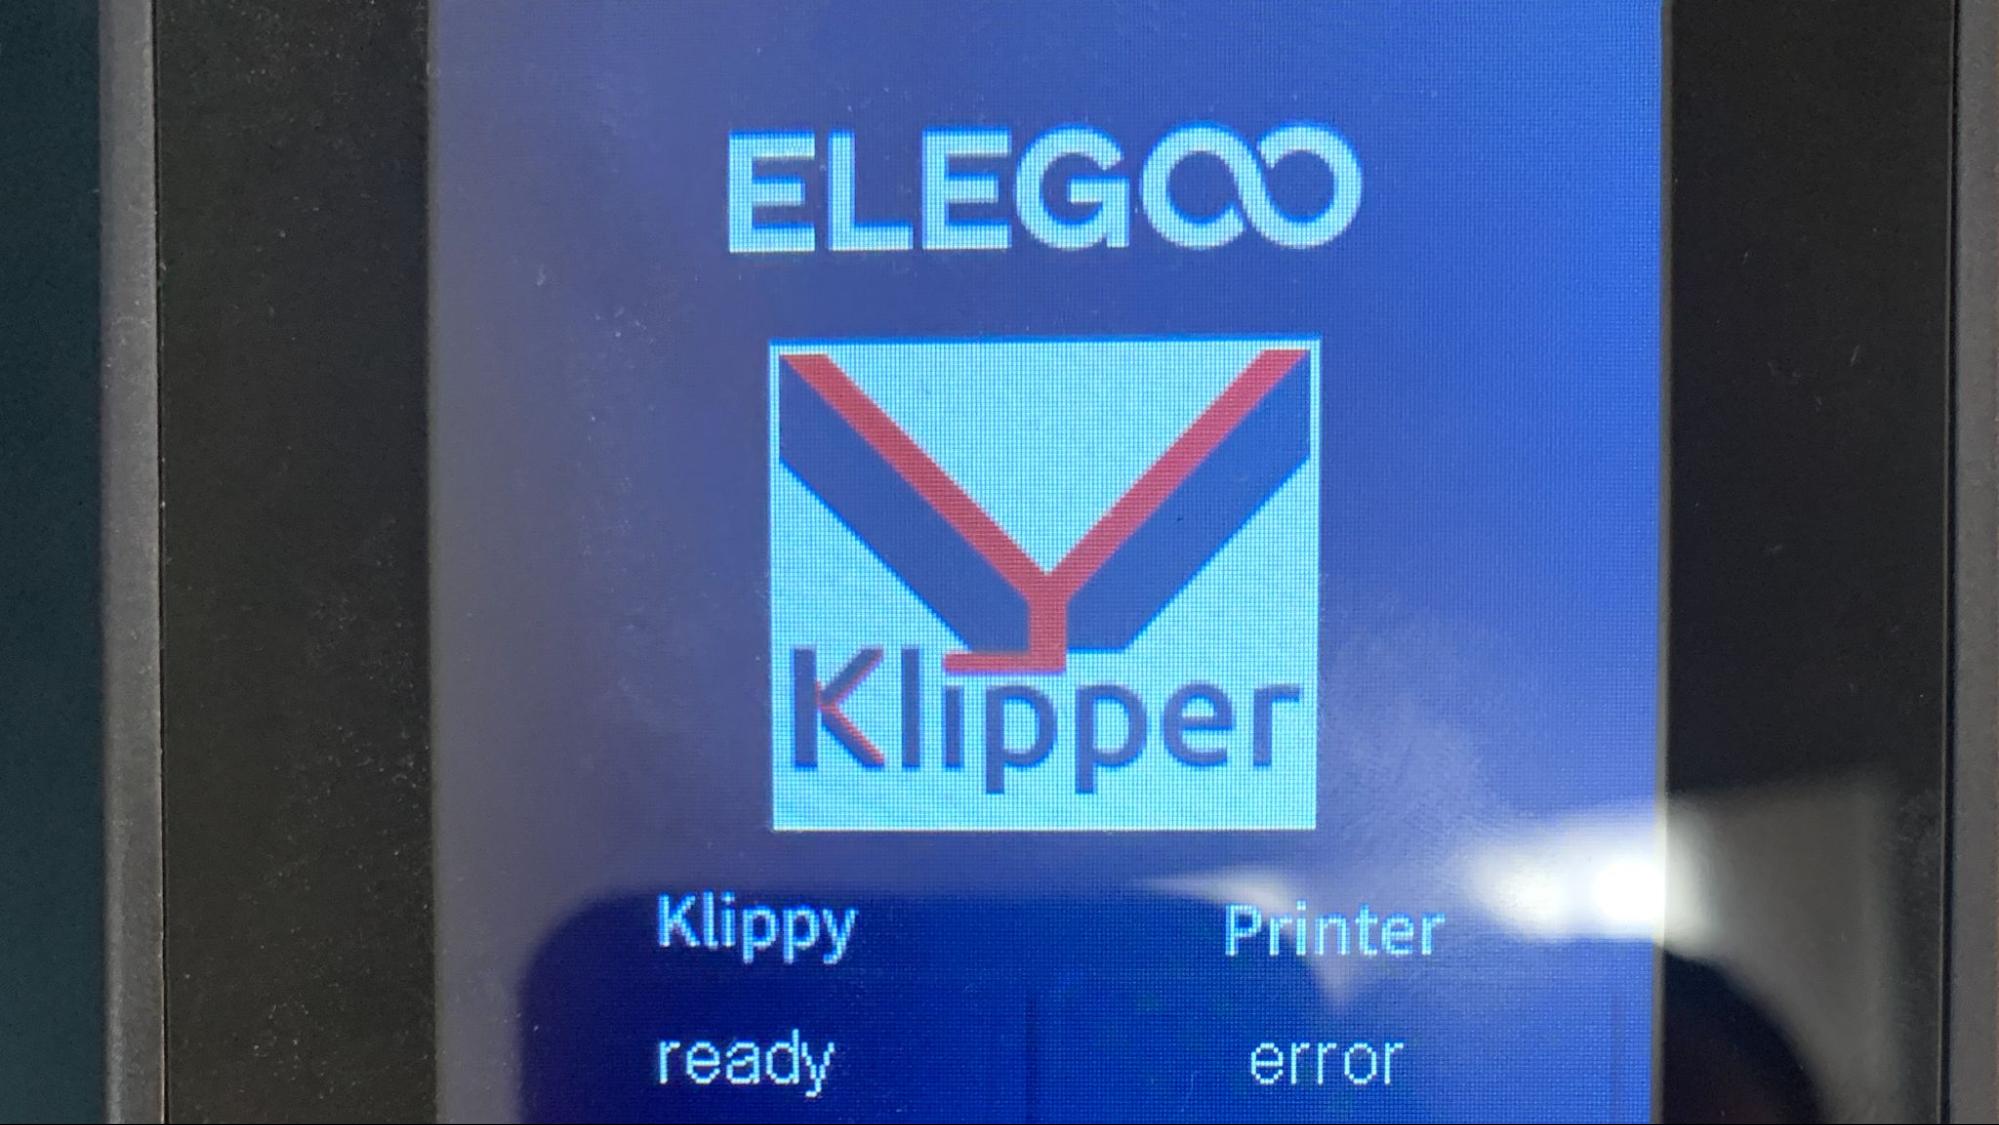
The Neptune 4 does not come with WiFi, making it tricky to even access Klipper. You can plug your machine directly into your router if you have an Ethernet cable long enough. I only hooked our test unit to the router for a short time because there was no good place to put the printer except the floor. You may be able to find a WiFi dongle that will work, but since Elegoo does not provide one, you’re on your own.
Accessing Klipper through Fluidd is the only way you can send files remotely or tinker with the machine’s settings, like input shaping or acceleration. Fortunately, the factory calibration is pretty decent, which should satisfy Elegoo’s desired beginner audience.
Assembling the Elegoo Neptune 4
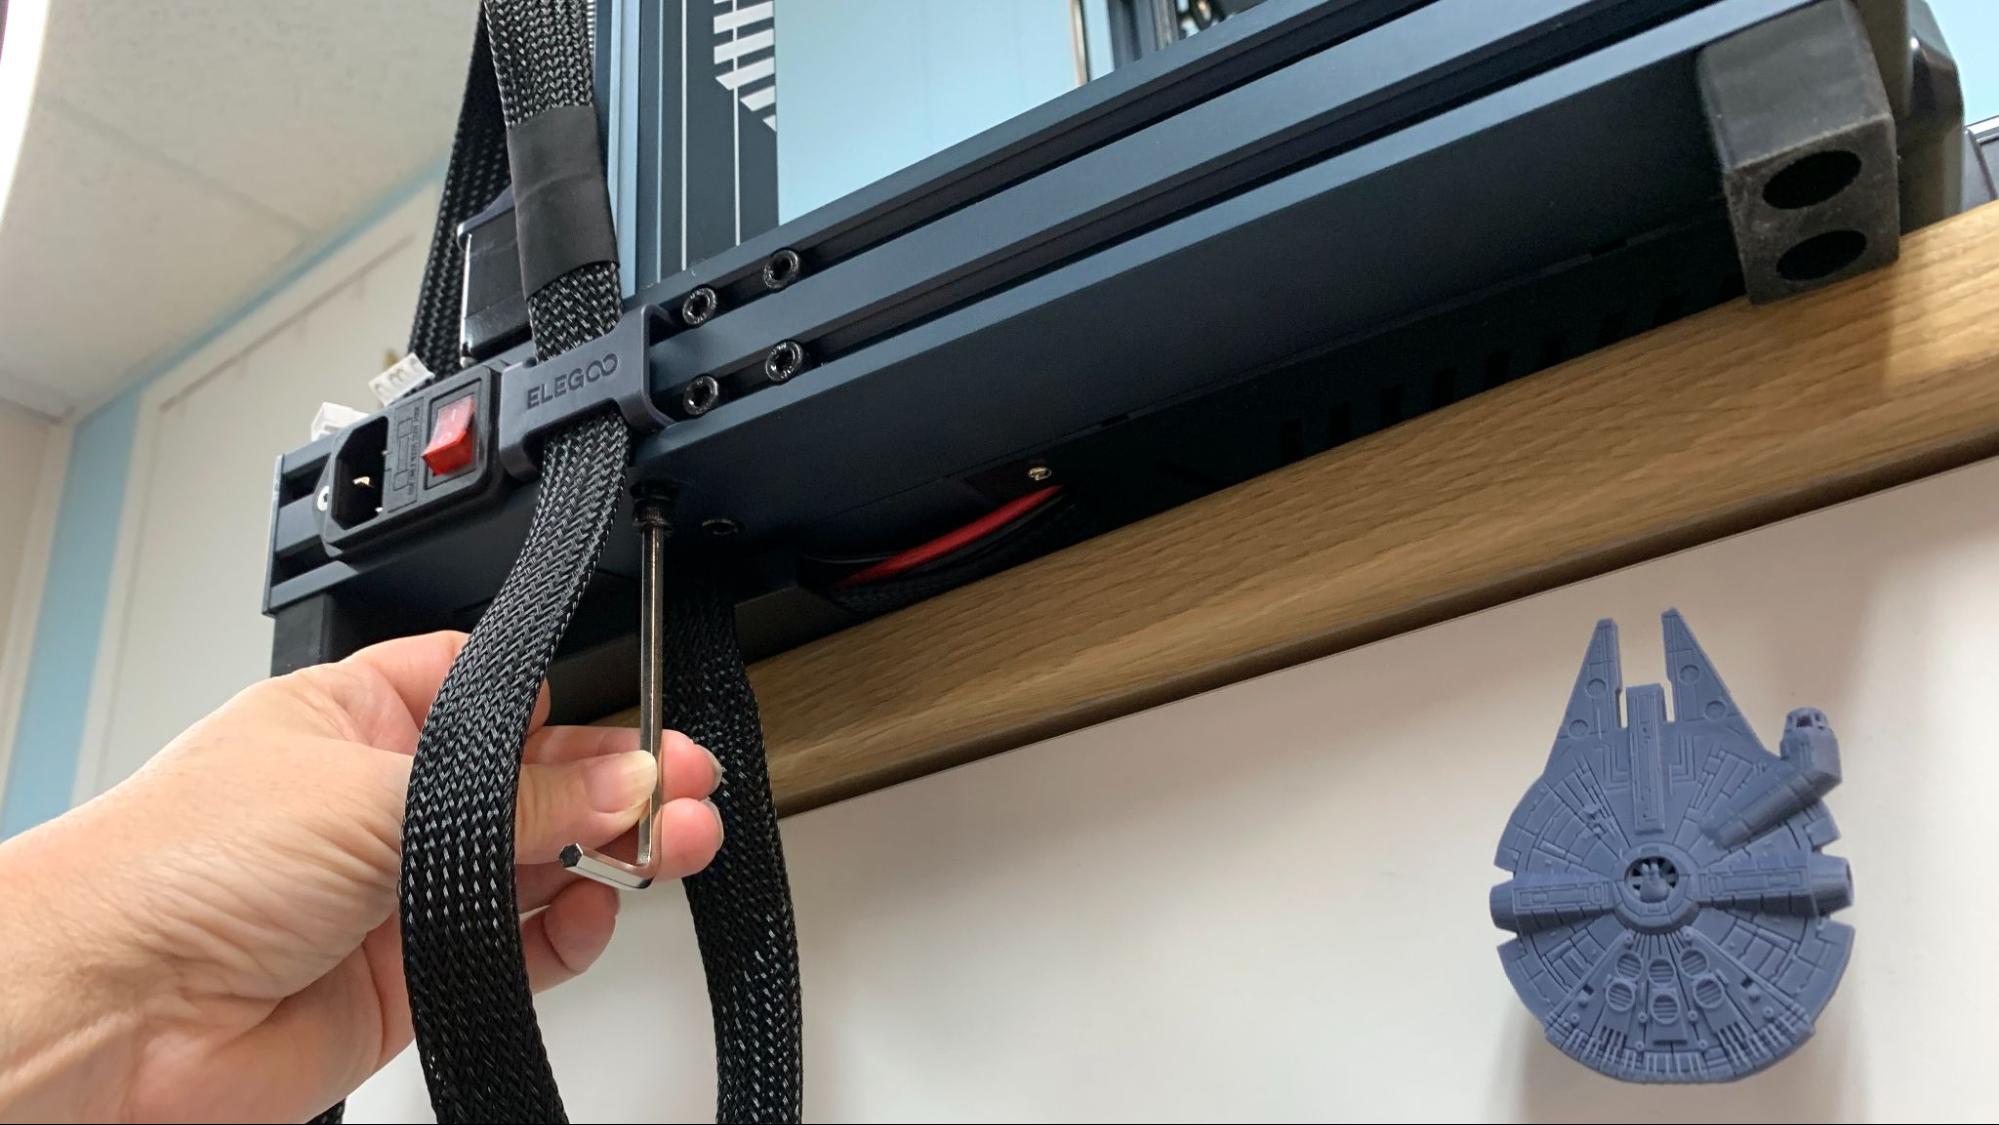
The Neptune 4 comes mostly assembled, only needing a few bolts to put the machine together. The upper frame is attached to the base with bolts that come up through the bottom.
The touch screen holder screws into the side and plugs in with a curly RJ11 cord, making it look like an old landline phone. All the electrical connections are labeled – or extremely obvious where they need to go.
Leveling the Elegoo Neptune 4
The Neptune 4 has returned to pairing manual leveling with an inductive auto level probe – a backwards move as the Neptune 3 and 3 Pro use a hard mounted bed. This system is not only more complex, but inferior. I saw the adjustment wheels shake loose and fall off the machine during an afternoon of speed testing. I would highly advise stopping by your local hardware store for some lock nuts to keep your knobs in place.
To start leveling, you’ll press the Level Icon on the main menu then find the Z height adjustment in the center of the screen. It’s not labeled, but it’s the number flanked by up and down arrows. Slide a piece of ordinary paper under the nozzle and tap the arrows until the nozzle just scrapes the paper.
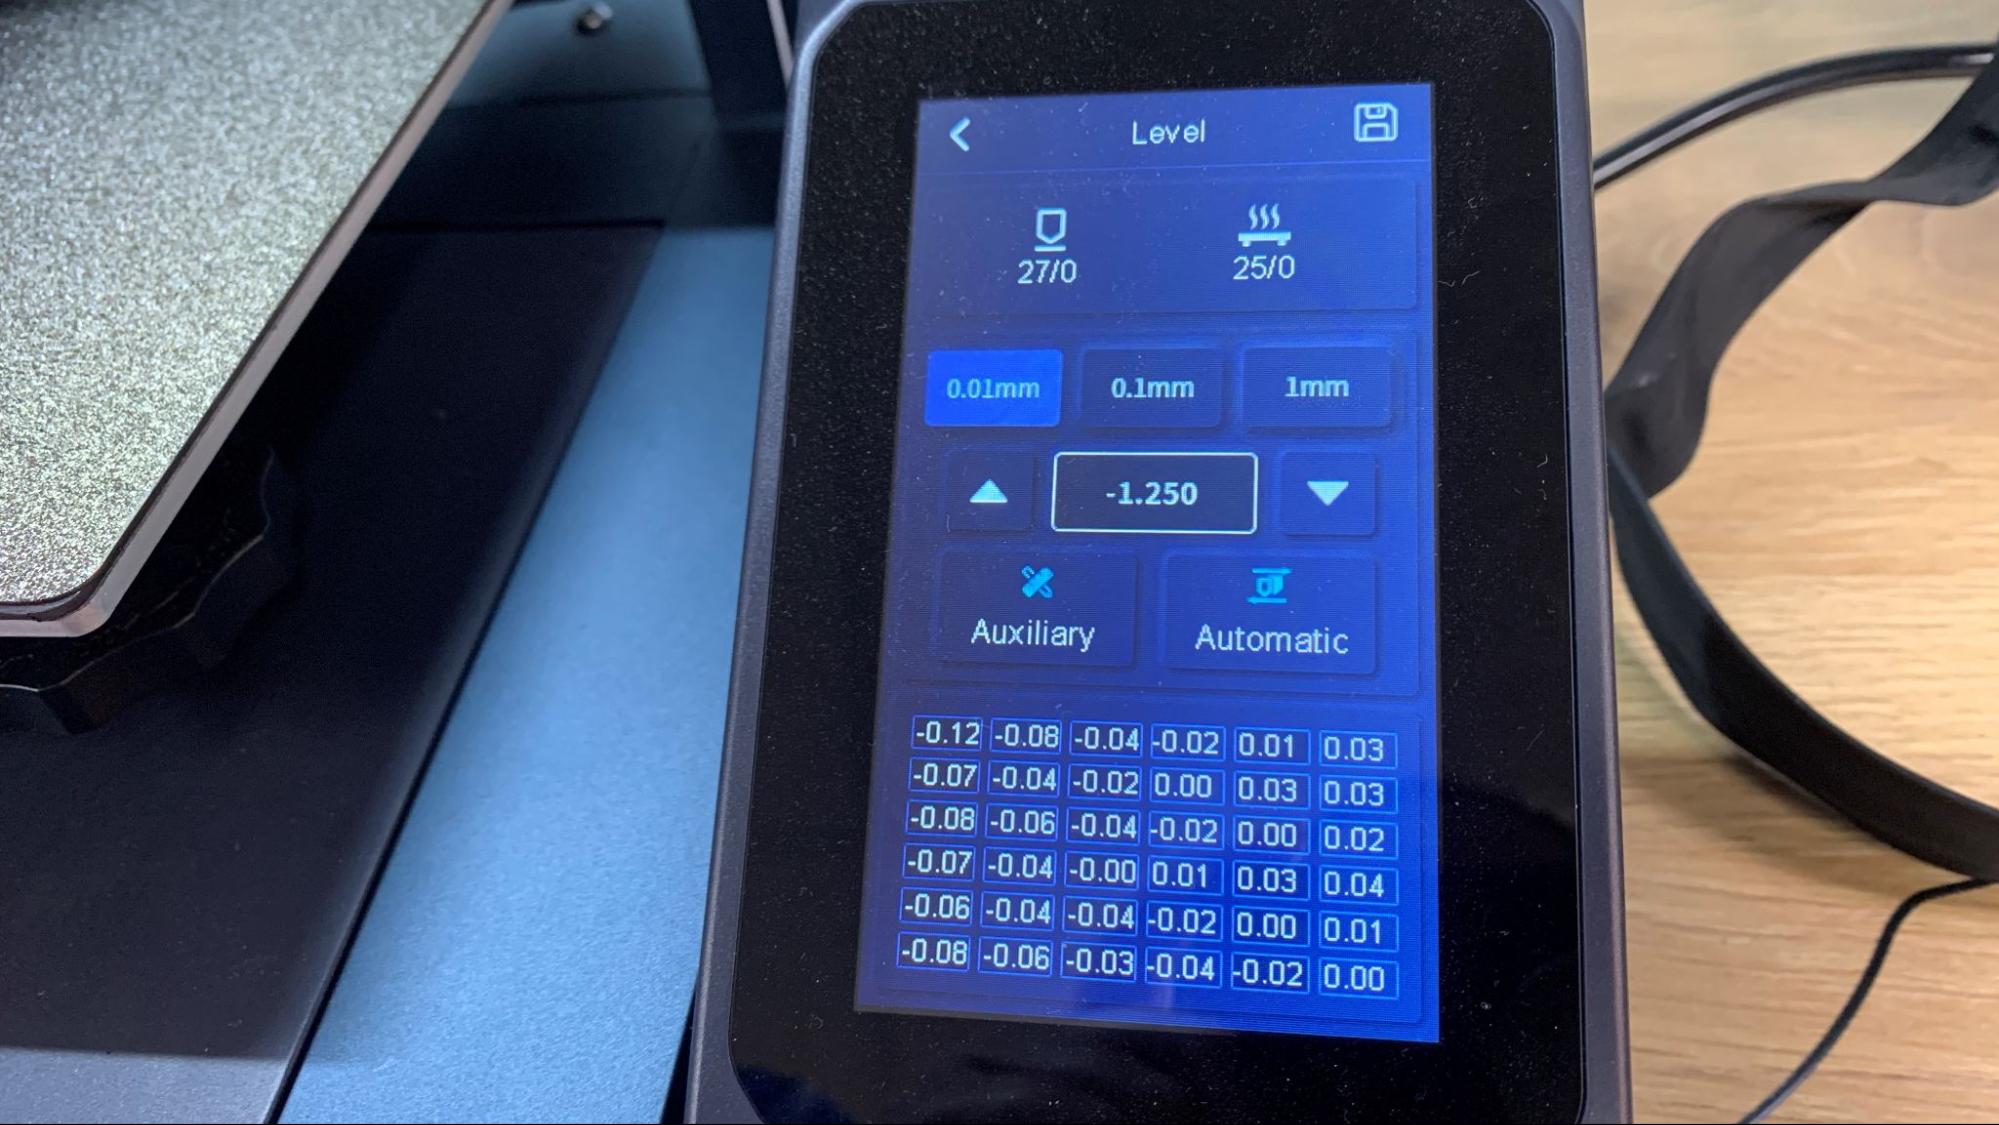
Now press Auxiliary to enter manual leveling mode. Tap the corner icons to move the nozzle to each corner. Place the paper under the nozzle and adjust the knob until it just scrapes the paper. You’ll need to do this several times as adjusting one corner will throw another corner off balance.
Return to the leveling screen and press Auto Leveling. This will perfect your manual leveling efforts. The bed will heat up, and the probe will bob over 36 points on the bed.
Return to the leveling screen and double-check the z height as it may have moved. Use the paper again and repeat the first step.
IMPORTANT: press the save icon in the upper right corner before leaving the leveling menu to save this data into the config file. The printer will use this data before every print and you won’t need to relevel unless you move the printer, or the wheels fall off.
Loading Filament on the Elegoo Neptune 4
The Neptune 4 is a direct drive printer with its extruder and hotend all in one spot. Loading filament takes a few more taps on the screen than previous Neptunes, but the mechanics are the same.
To load filament, tap Prepare on the main menu, then Temperature and select the one of four presets that match your filament. Once the hotend is warmed past 190 degrees, you can insert the filament into the top of the extruder and let the wheels pull the filament through.
To unload or change colors, simply reverse the process.
Preparing Files / Software for Elegoo Neptune 4
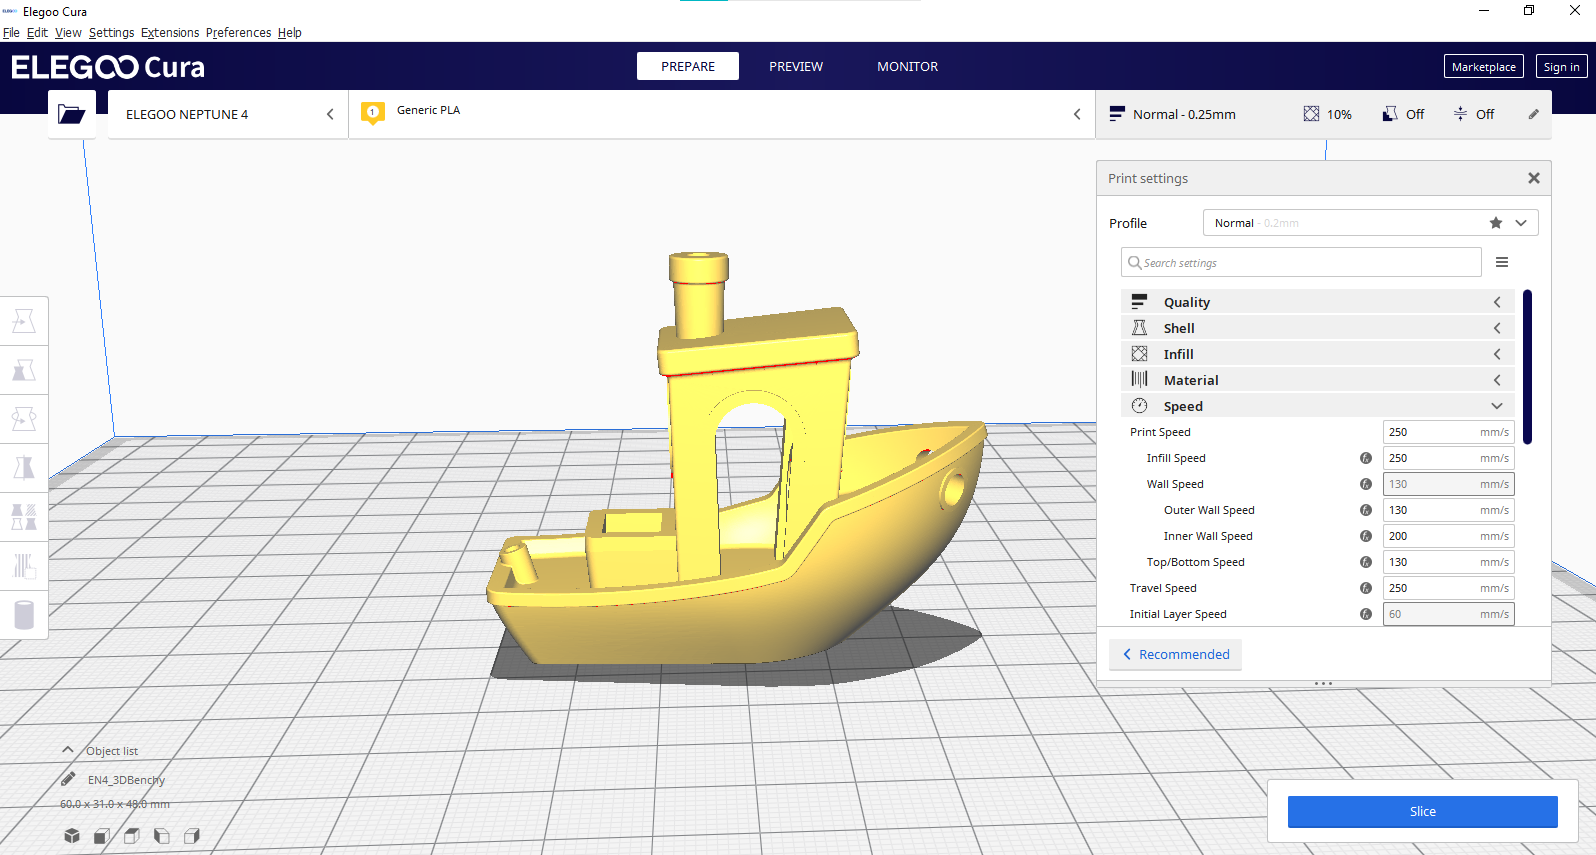
The Neptune 4 comes with a copy of Elegoo Cura, which has profiles for all its machines and several materials. It also has the added ability to create a thumbnail of your model to display on the printer. Though Elegoo claims the Neptune 4 has a maximum speed of 500mm/s, the default profile provided is 250mm/s. There is no profile for higher speeds, so you’ll have to experiment with that yourself.
Standard versions of Cura or Prusa Slicer don’t have profiles for the Neptune 4, but you can use the profile for a Neptune 3 and bump up the speed.
Note: The Neptune 4 doesn’t have Klipper “START_PRINT” and “END_PRINT” macros, but rather uses the Marlin start and end codes.
Printing on the Elegoo Neptune 4
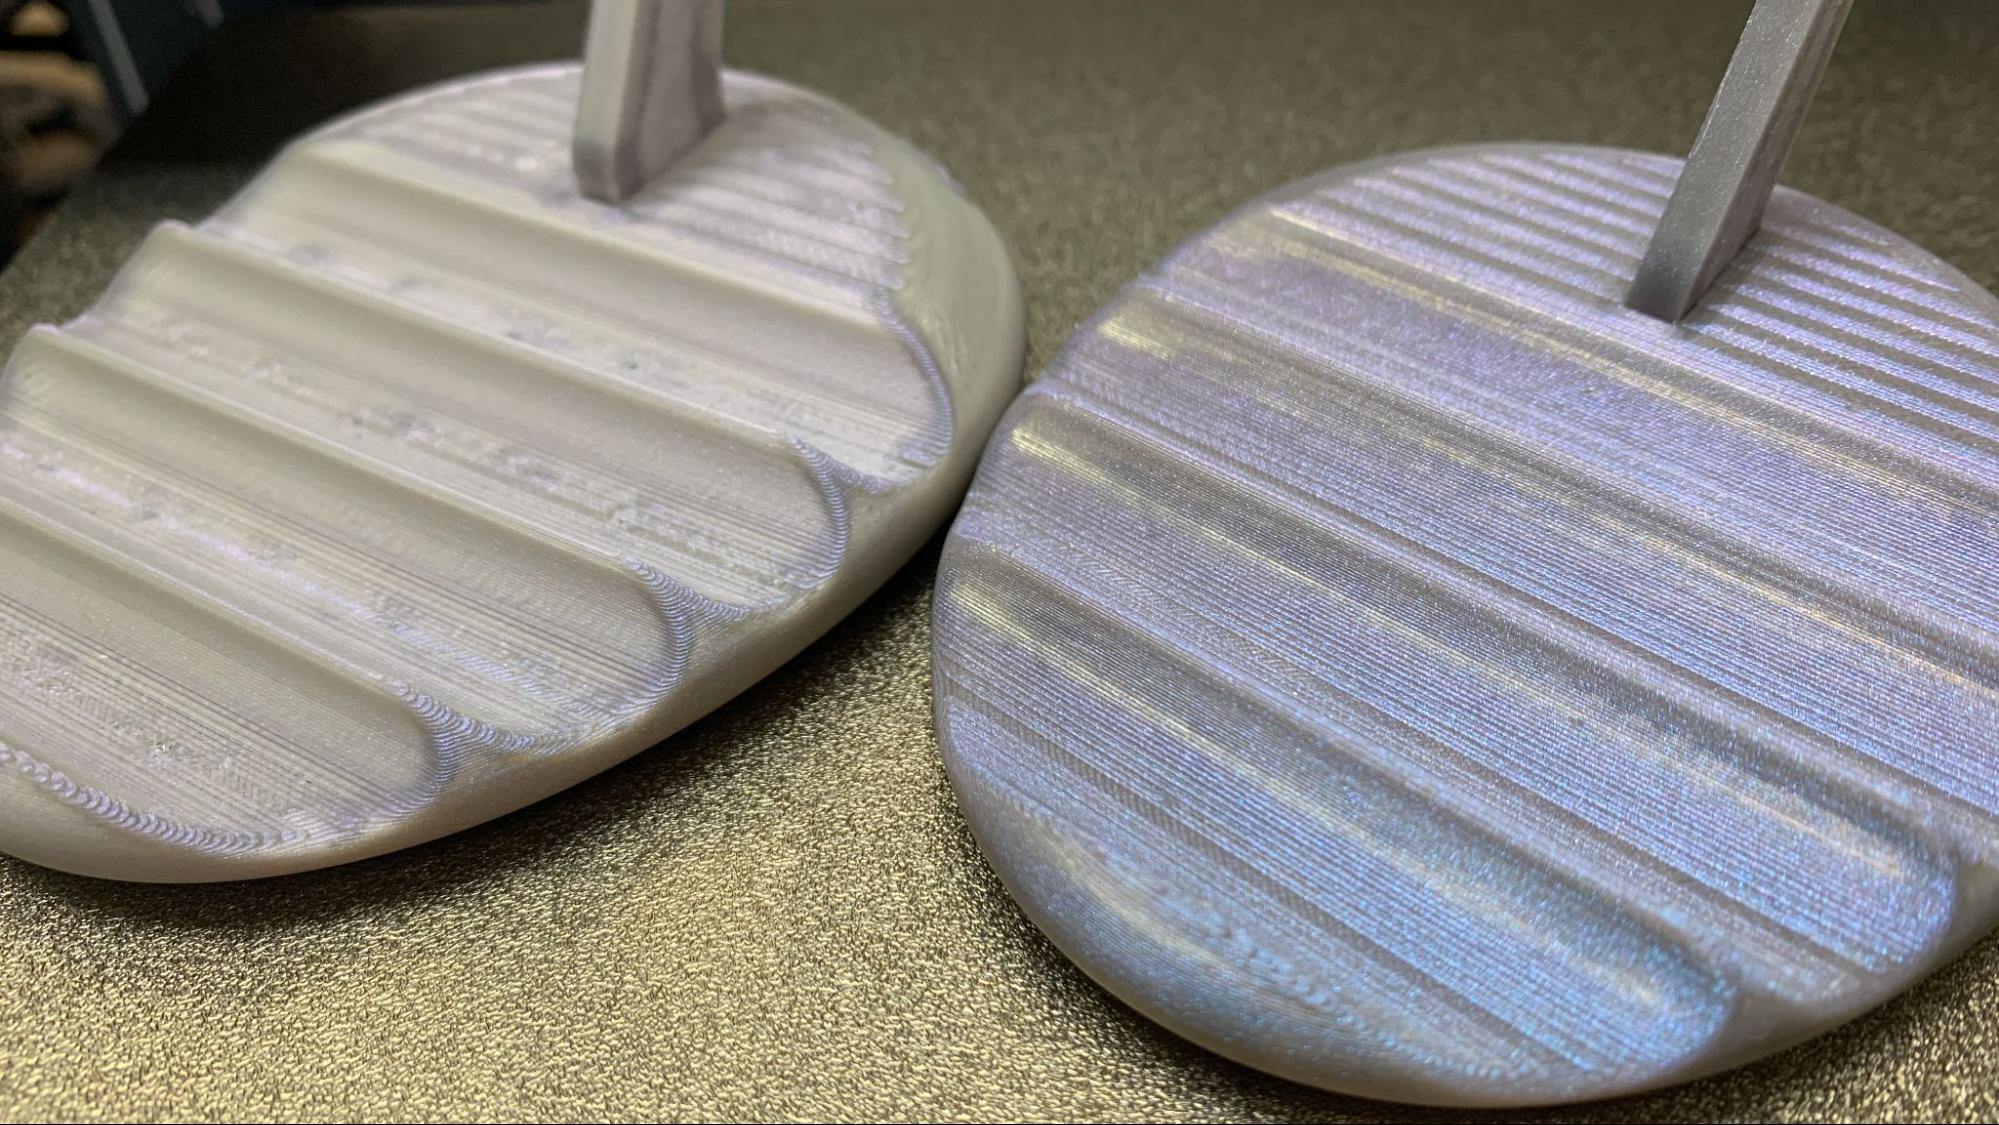
You’ll quickly learn that speed isn’t everything, especially when printing filament that is normally glossy. High speed printing wrecks havoc on the finish, often producing surfaces that are flat and dull. If it’s a practical print, you may not care if your part isn’t shiny – but if you’re printing decorative parts you’ll want slower speeds. Fortunately, you can find balance by printing the infill and inner walls at high speed while slowing the outer and top layers for a nicer finish.
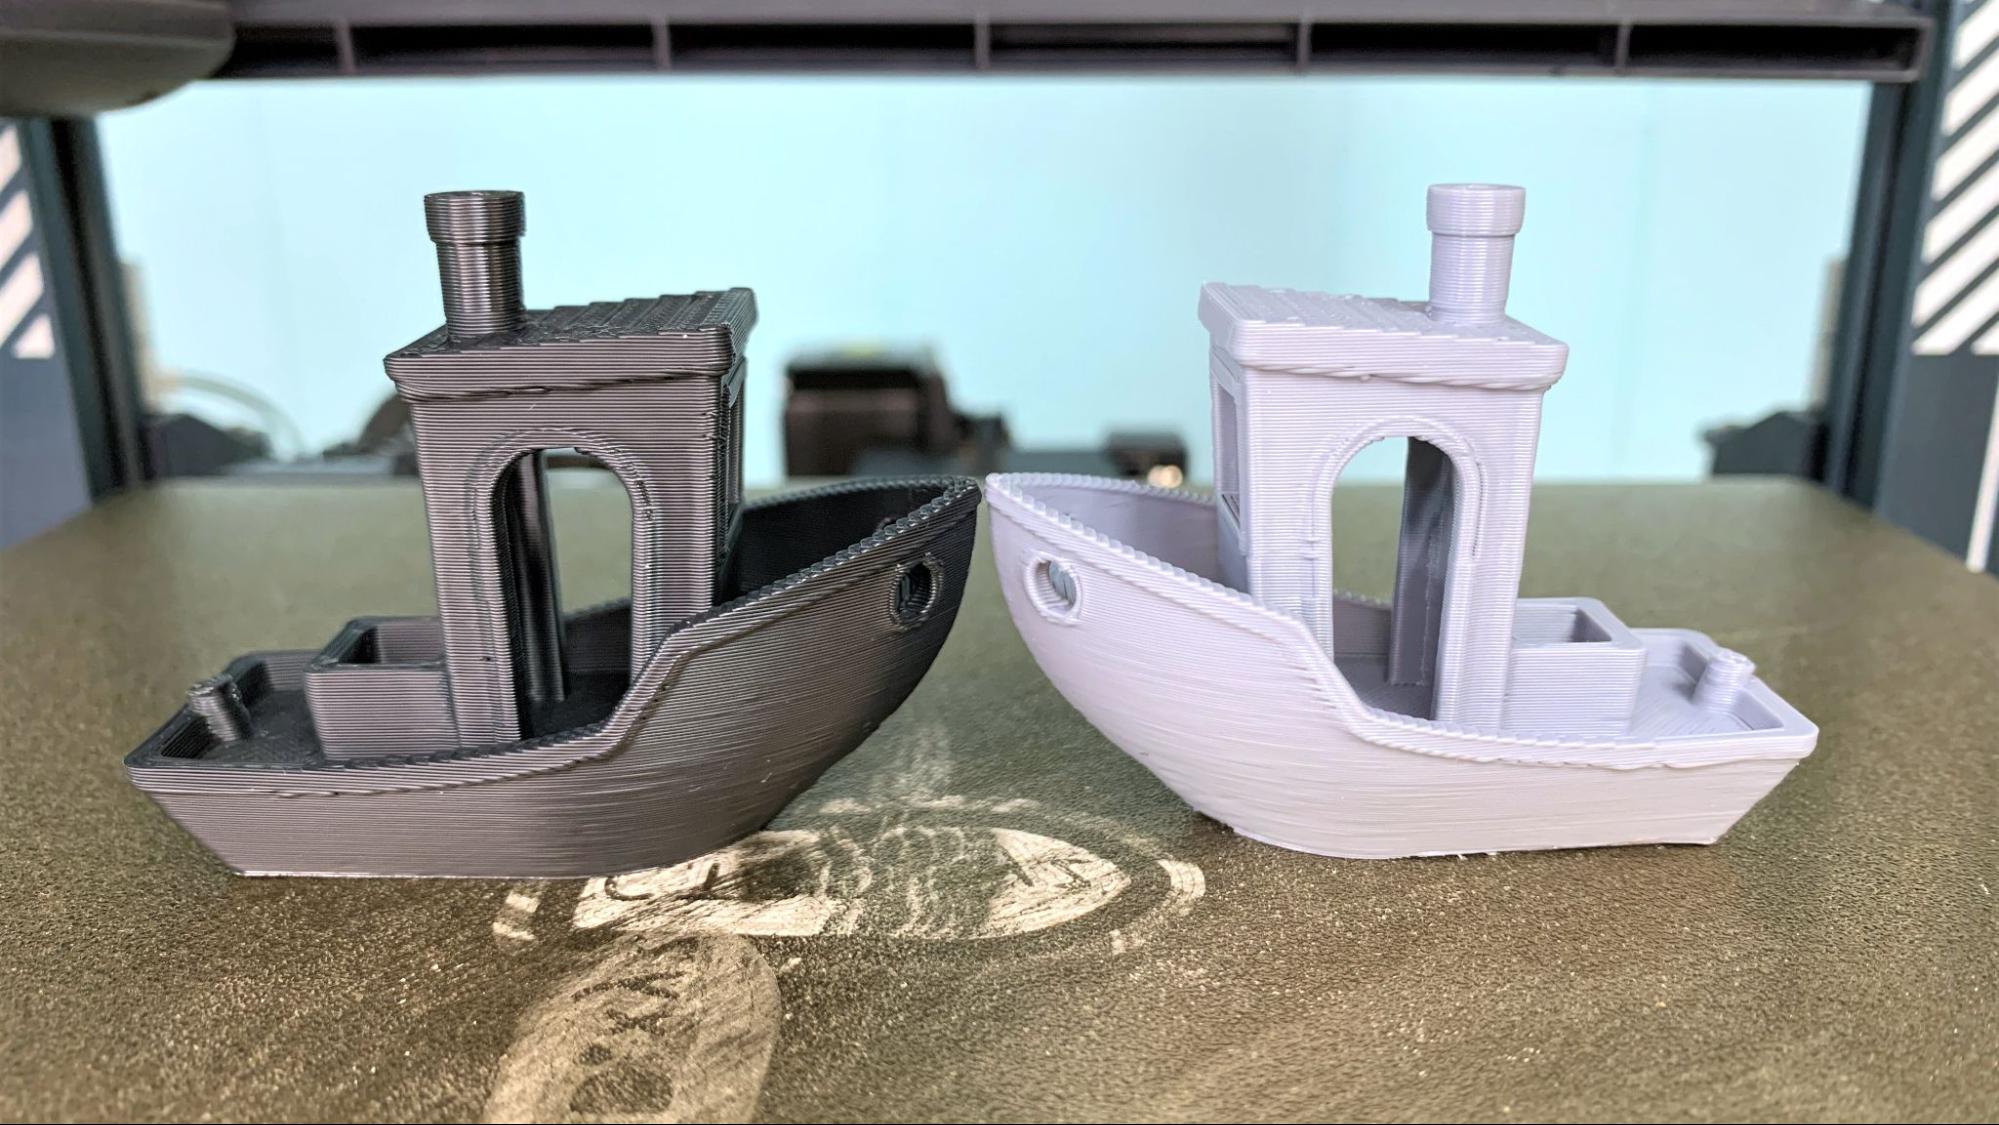
Below is a model printed in the same filament, Polymaker Starlight Mercury PLA. The one on the left is dull grey after being printed at 250mm/s. The one on the right retains its purple sparkle and was printed with 250mm/s for the infill and inner walls, but 75mm/s on the outer wall and top/bottom layers.
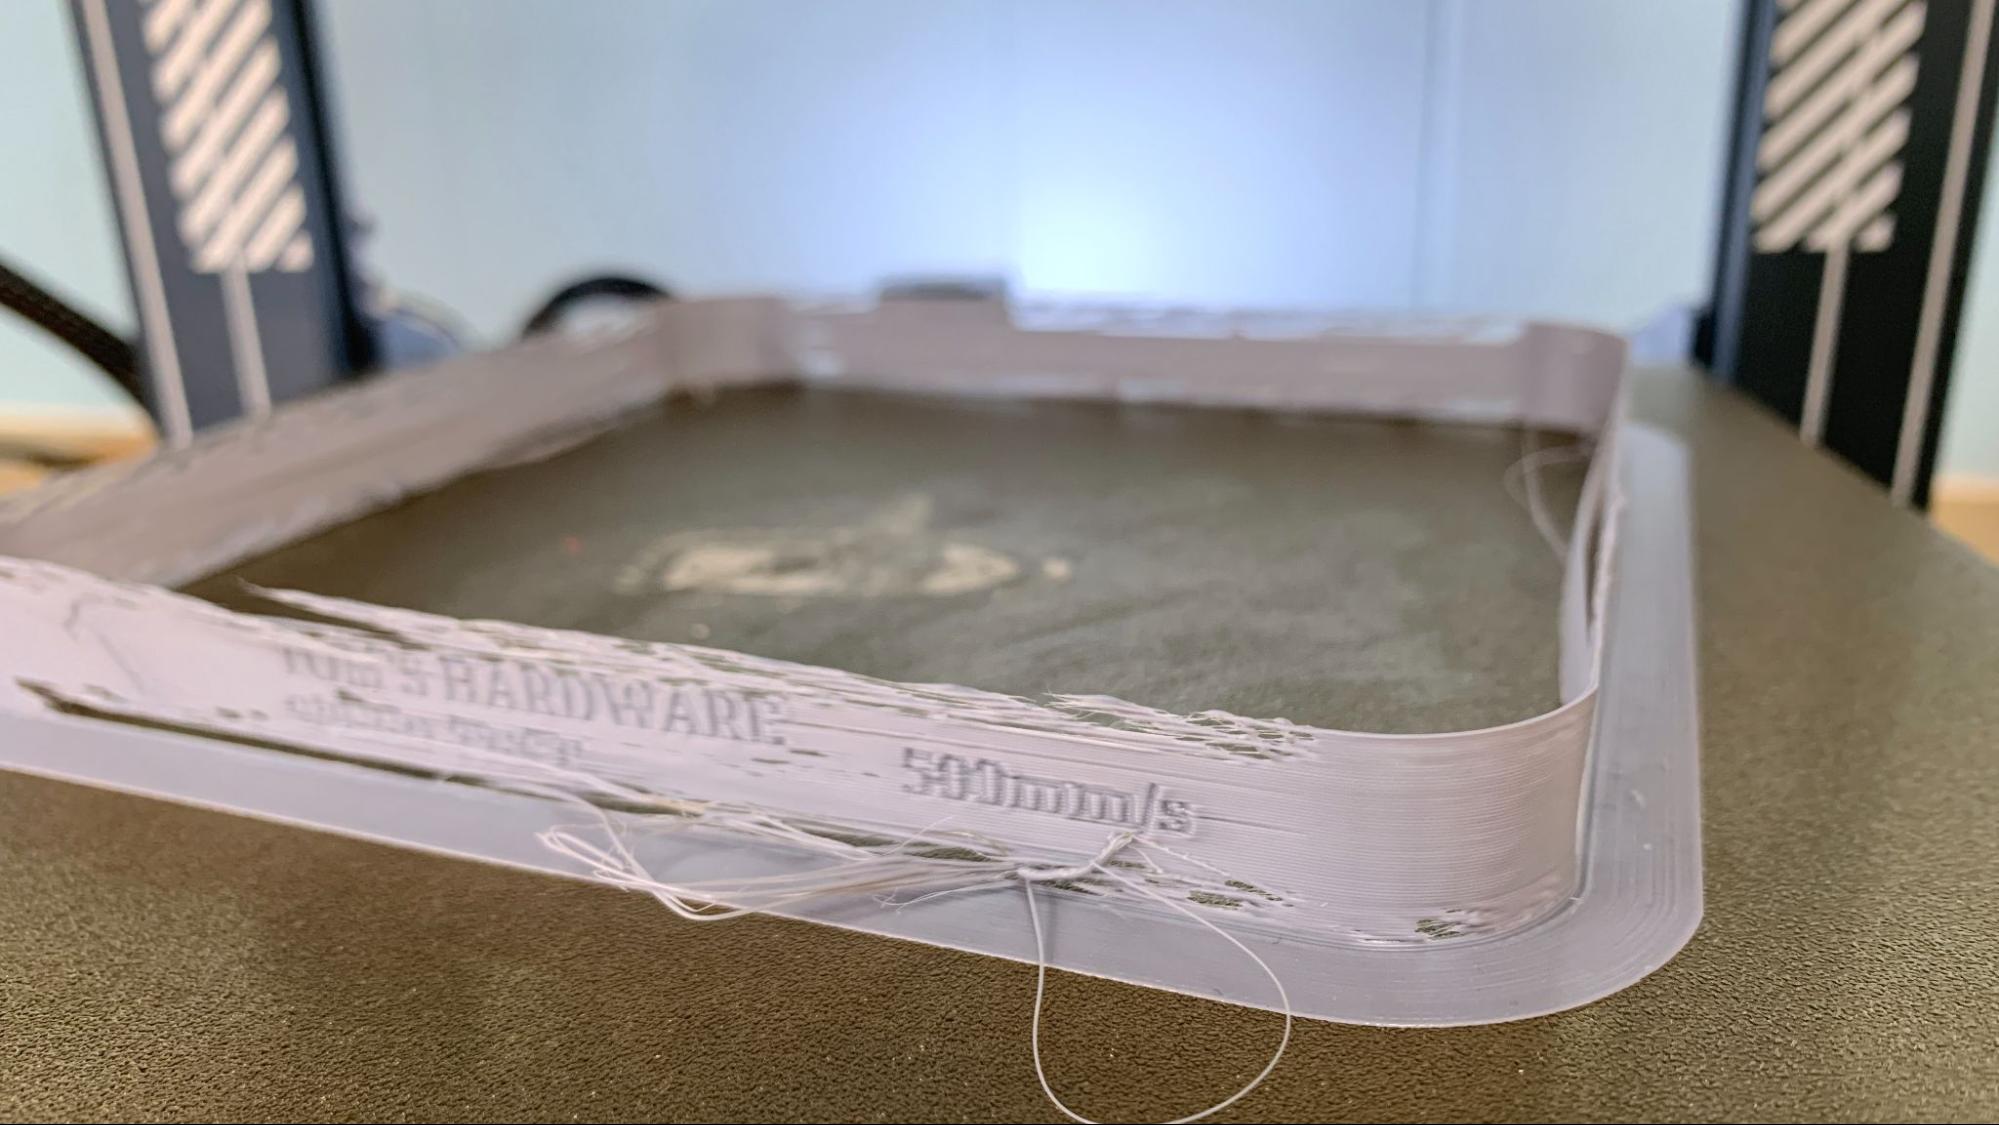
The other issue with high speed is that many prints are not long enough to reach the manufacturer’s claim of 500mm/s. Once you factor in acceleration (capped at 5000mm/s on the Neptune 4) and the need to slow down for corners, you’re doing 250mm/s at best.
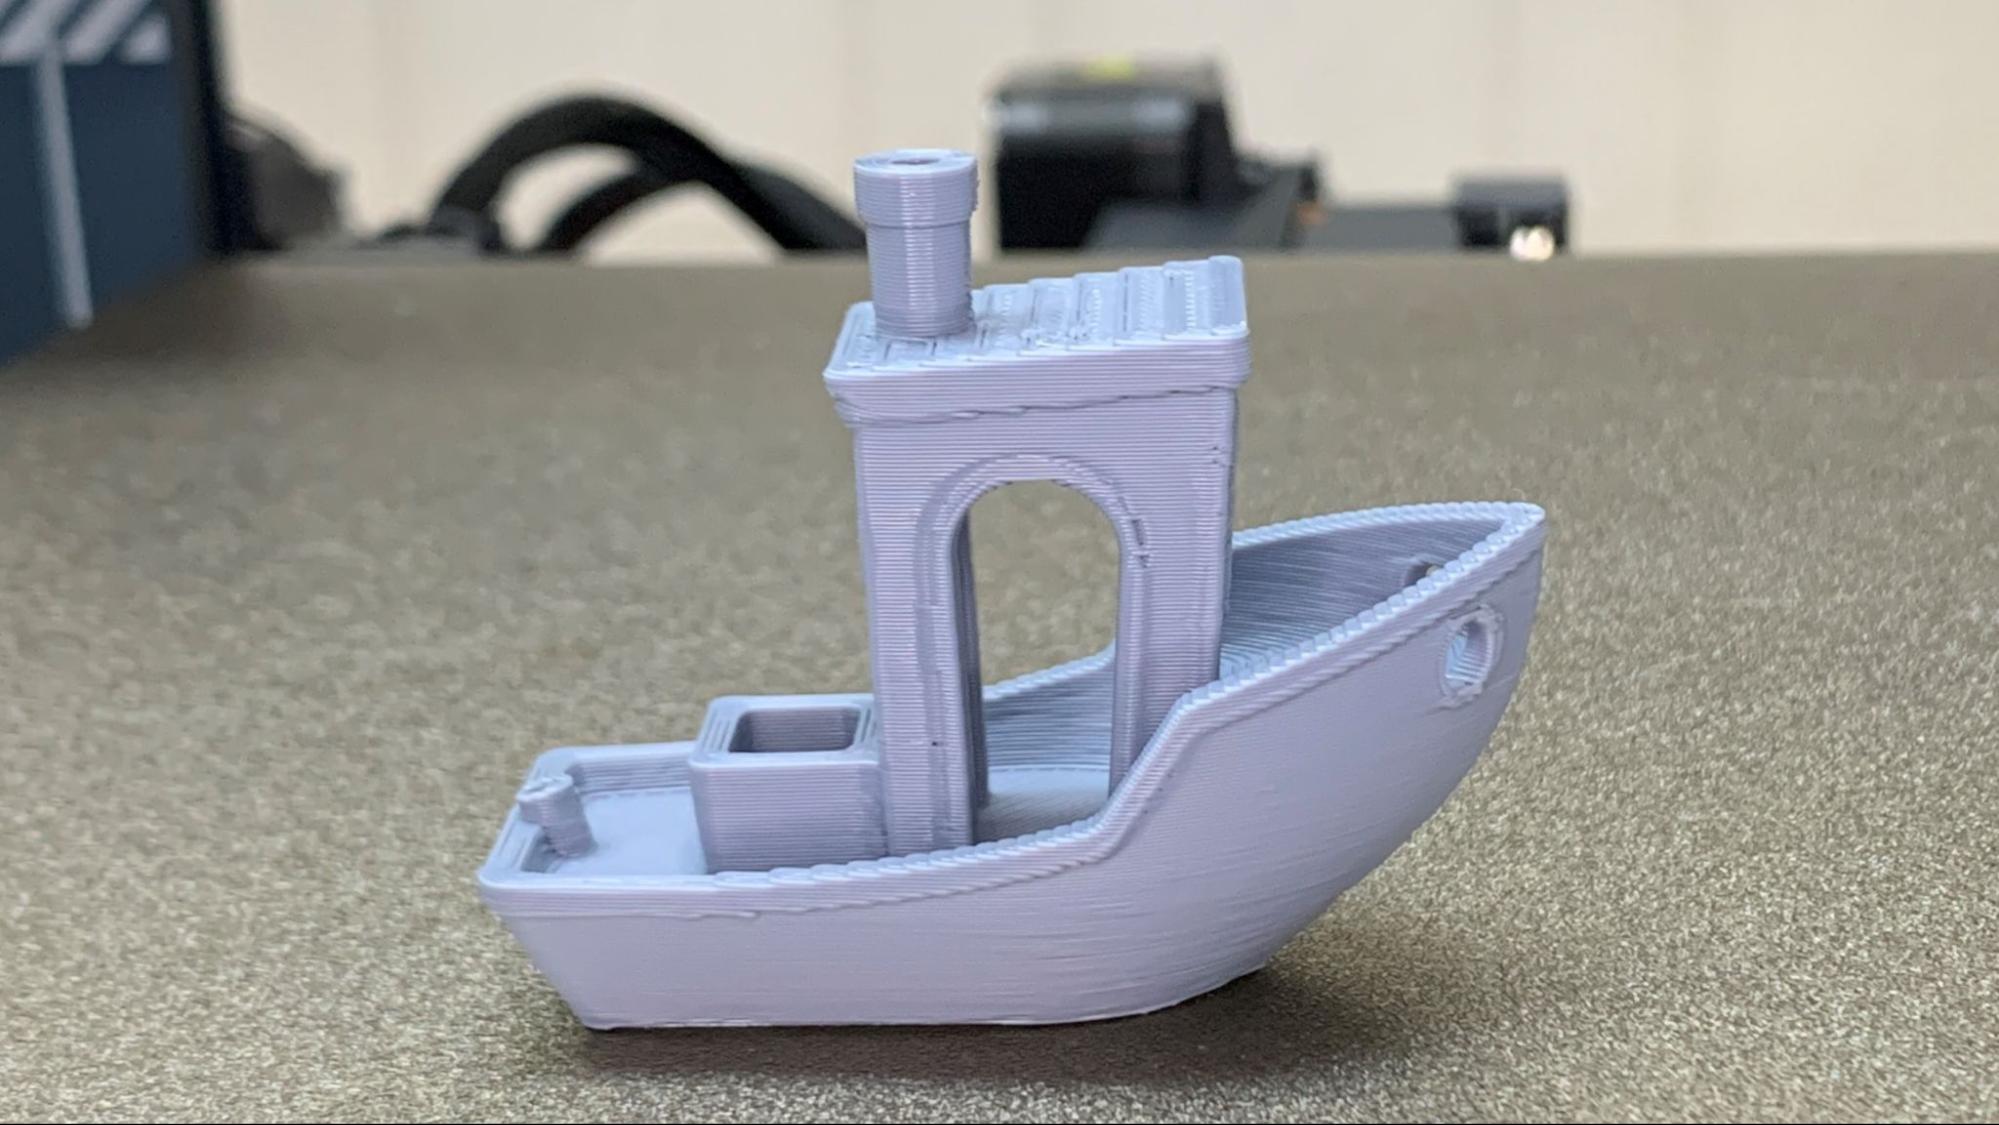
Still the Neptune 4 is much faster than the Neptune 3 Pro and similar last-gen bedslingers. The printer achieved a very good 20 minute Speed Benchy. This is the traditional Benchy test print using standards adopted for speed contests. It has 2 walls, 3 top and bottom layers, 10% grid infill, a .25 layer height and .5 layer width. Printed in ordinary gray Inland PLA, this boat is a little rough on the hull, but there’s no ghosting and the overhangs are perfect.
Elegoo sent a spool of Rapid speed PLA+ to try out with this printer. The results are marginally better than our tests with Inland PLA. You don’t want to limit yourself to one kind of filament, so check out our guide to the best filaments for 3D printing for examples of our favorite materials to add to your supply.
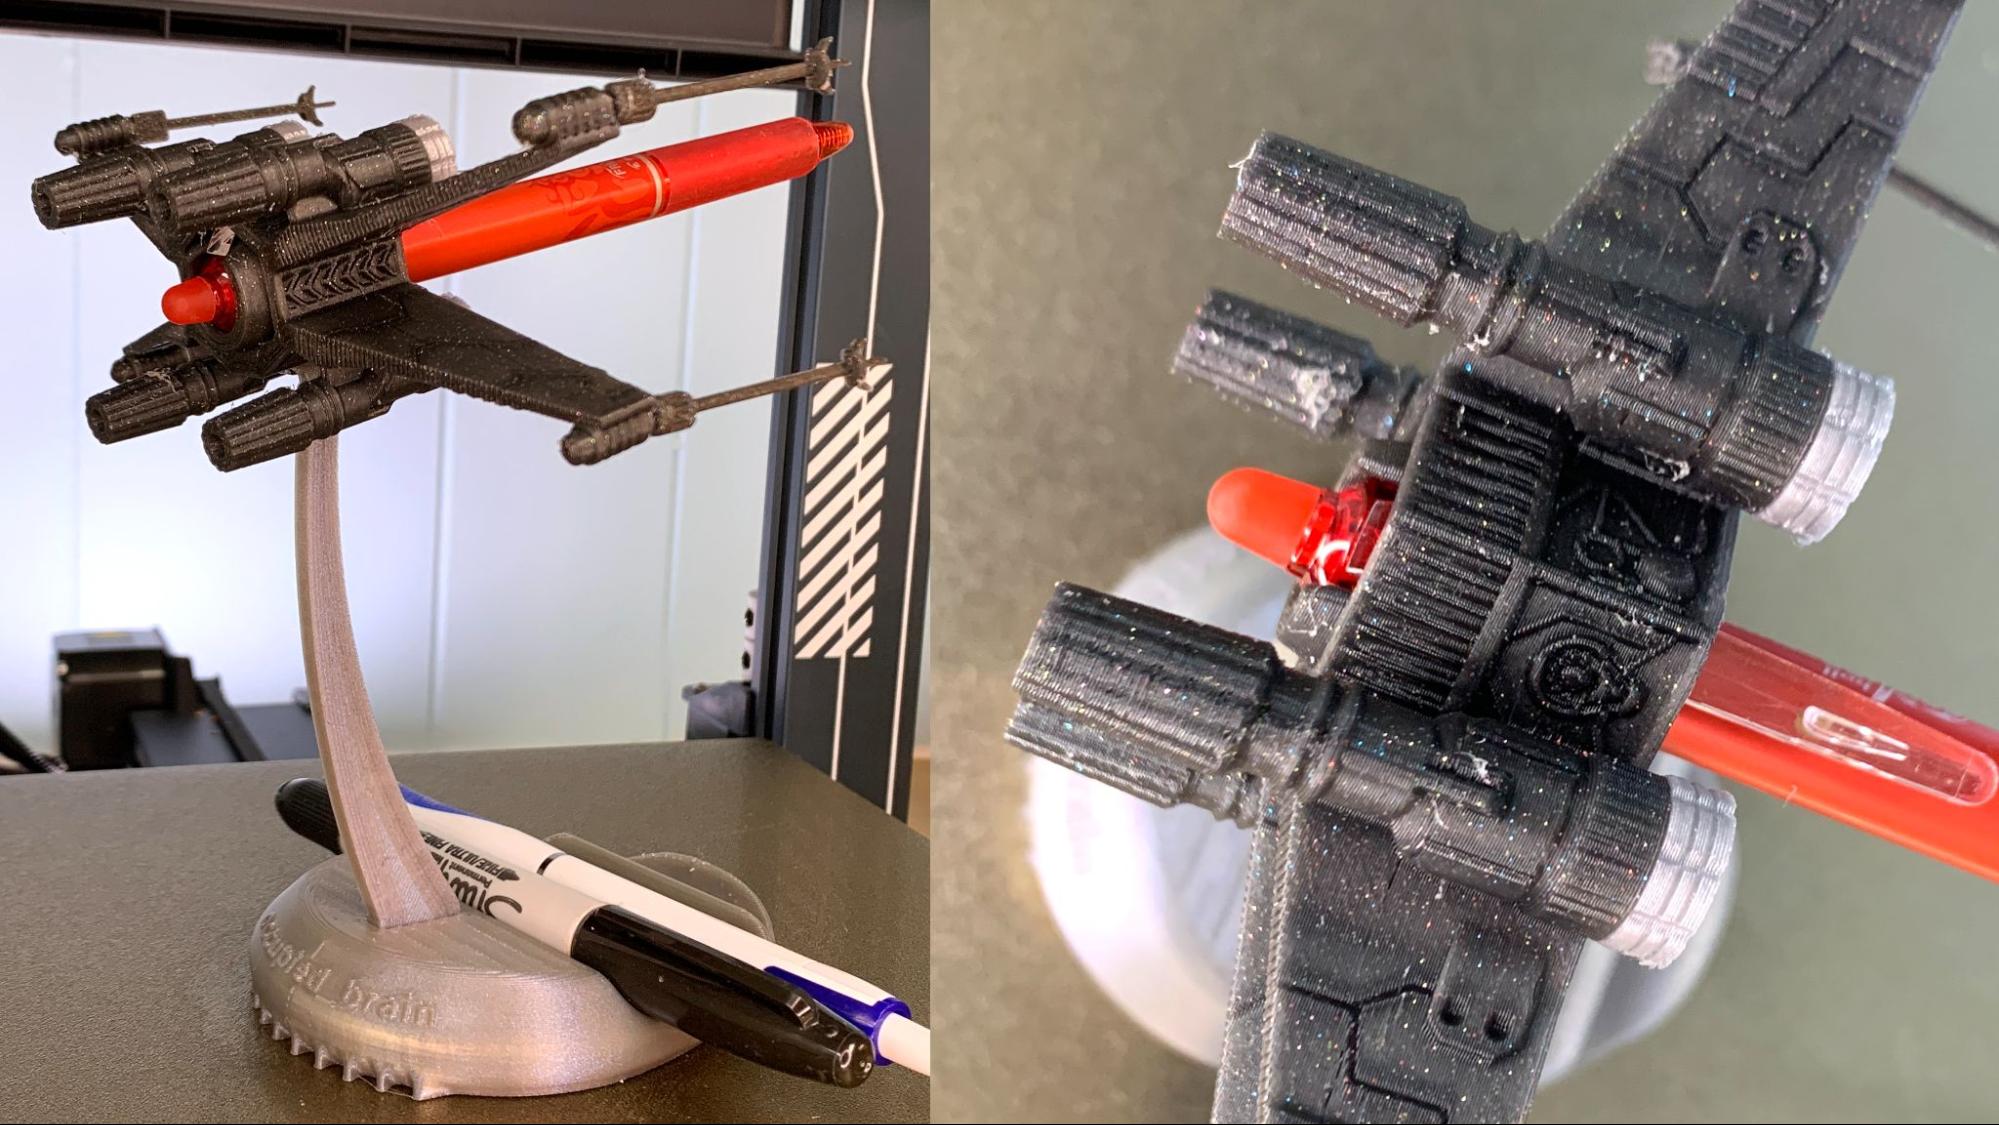
The printer is more than capable of producing smooth, quality prints when you slow it down a bit. This X Wing pen holder was printed using the default settings, which uses 250 for the inner parts and 130 for the outer walls and top/bottom layers. The detail is crisp, without any ghosting, but the color is a bit washed out from the speed. Printed in ProtoPasta Wonder Black Rainbow Glitter, Polymaker Starlight Mercury PLA for the stand, and Prusament Galaxy Silver for the engine highlights. Total print time is 3 hours and 9 minutes, using 3 walls, 250mm/s inside parts and 75mm/s outer layers & walls.
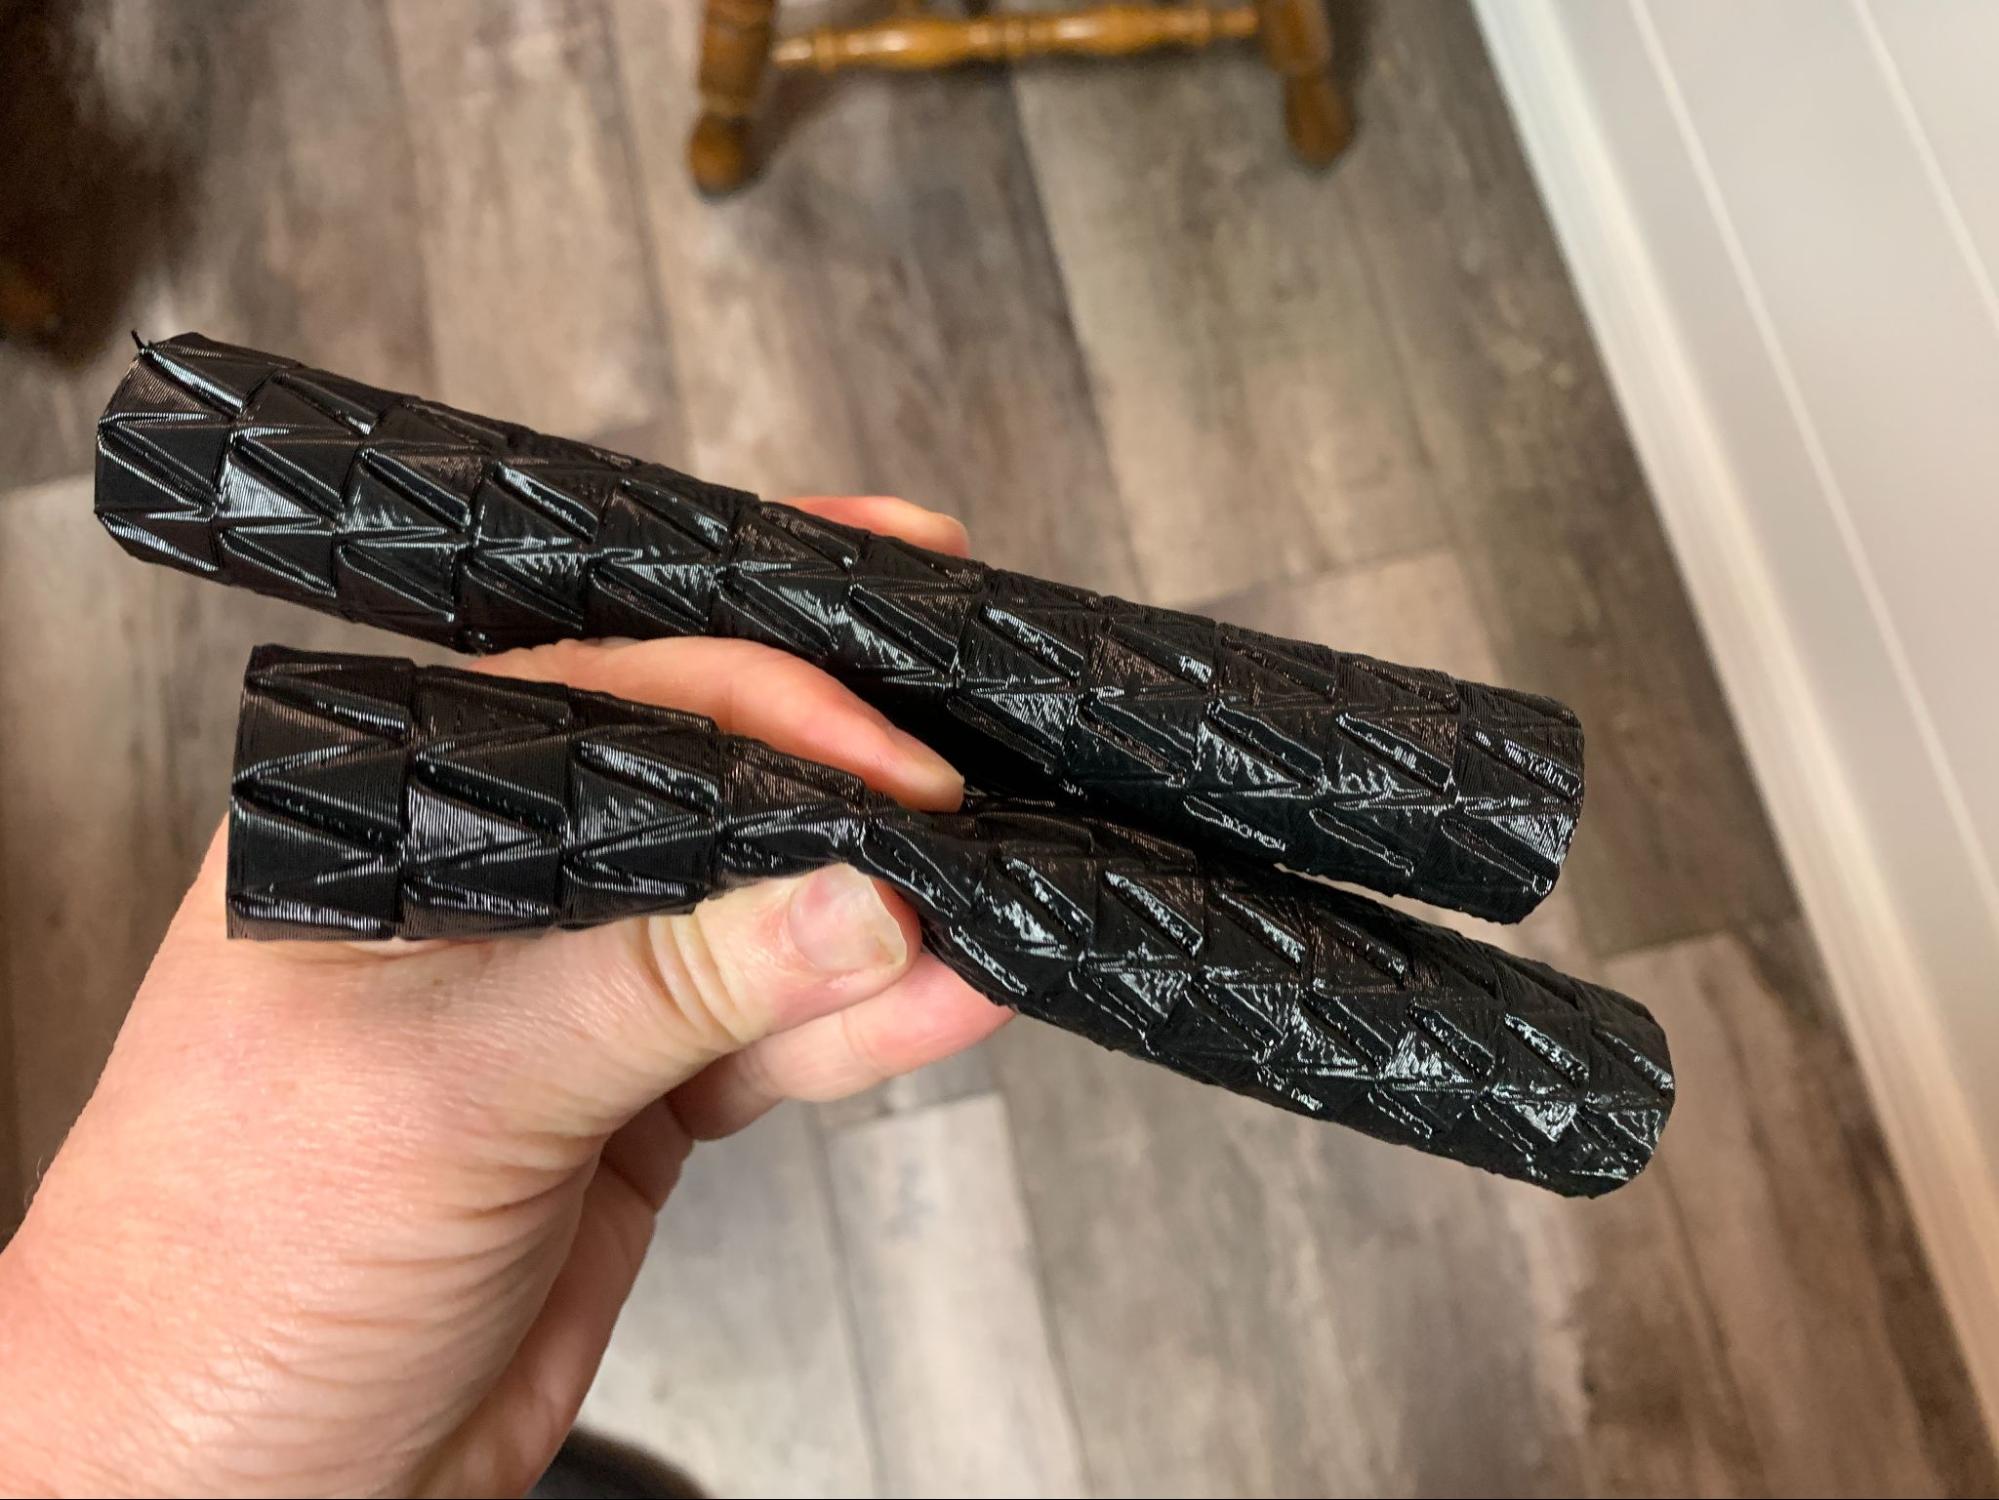
The Neptune 4 did a remarkable job with TPU when slowed down to 50mm/s. These bike handle covers may not be the best print to show off the machine’s quality – the pattern did get rougher the farther away it got from the bed. But considering these slender tubes are 157 mm tall and quite squishy I’m amazed they worked at all. These printed in 1 hour and 53 minutes each using Elegoo’s default settings for TPU.
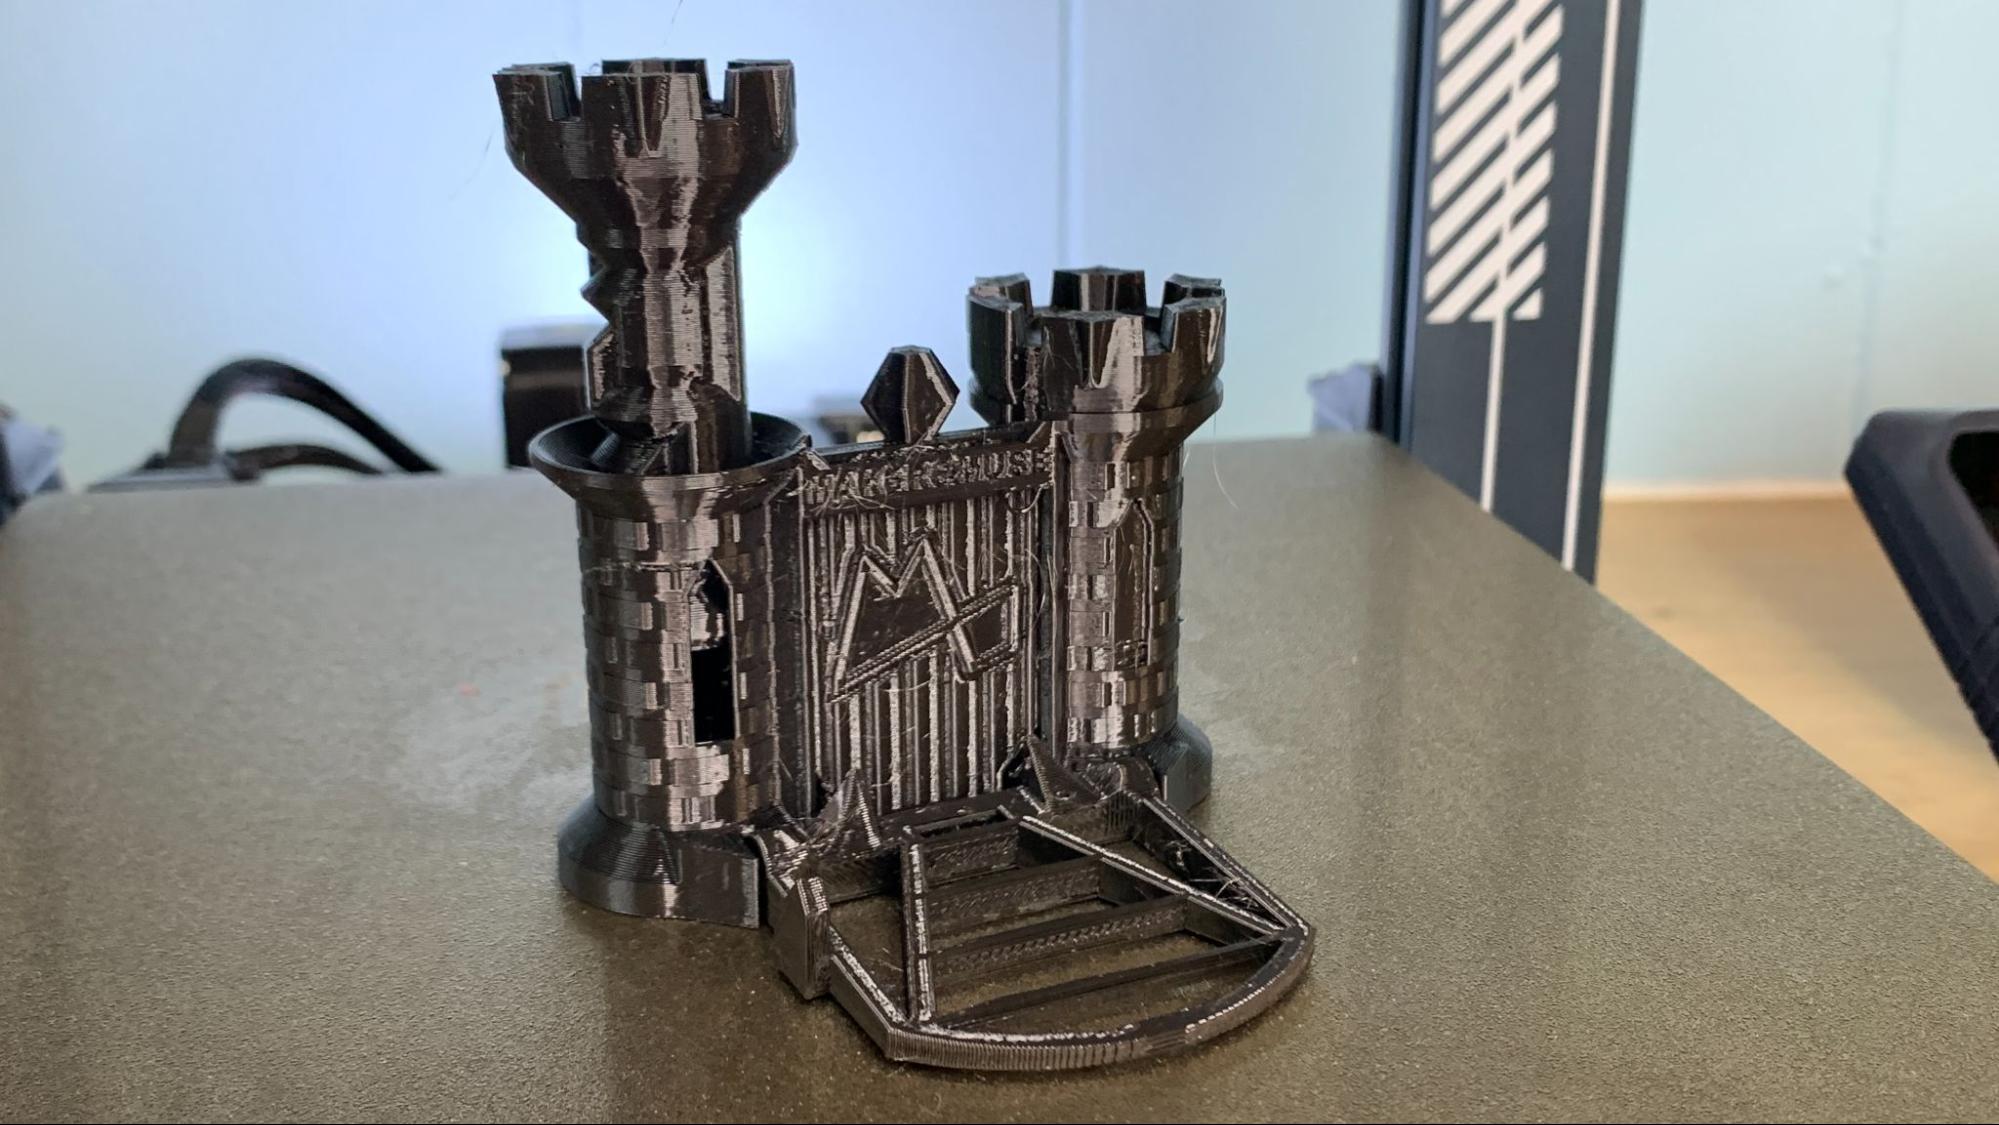
I did several prints in PETG, but this Maker’s Muse Clearance Castle really shows off the Neptune 4’s quality. The castle is a torture test with tight clearances and bridging, which all printed quite well with crisp lines and little stringing. This used Elegoo’s default settings for PETG which slowed the printer to 50mm/s on the outer walls, 80 on the inner walls, but kept a brisk 150 mm/s on the infill. It was able to complete the print in 2 hours and 6 minutes. The Neptune 3 would have taken three hours more, so this is still a significant time savings.
Bottom Line
The Neptune 4 is a confusing little 3D printer. Is it for beginners? Maybe. Is it for fans of Klipper? Not really. It comes with an unrestricted copy of Klipper, a huge plus, but makes it difficult to access without WiFi. You can certainly run a cable to it, but how many people have their router on the same workbench as their 3D printer?
The variables that come with high speed printing make me reluctant to recommend this printer for beginners, who may not understand why their shiny new printer can’t run full tilt at the manufacturer’s claim of 500mm/s. On the other hand, those who have experience with Klipper may feel frustrated that their access is physically restricted by a simple lack of hardware.
Who is it for? With a tantalizing price tag of $259, the Neptune 4 is perfect for makers at the midpoint of their journey. People who understand the ins and outs of Cura settings, but aren’t control freaks and need to tweak every aspect of their Klipper config file, people who are comfortable with “good enough” input shaping and relish the bargain of an affordable fast printer.
I’m still going to recommend the Neptune 3 Pro for absolute beginners, especially with its reduced price of $199.99. If you want a simple-to-use Klipper printer with no restrictions, then check out the Sovol SV07. Priced at $339 it has both the expected WiFi plus a really sweet Klipper Screen that puts all the data at your fingertips. If your budget allows, the $699 Bambu Lab P1S cannot be beat for pure speed, range of filaments and ease of use.
MORE: Best 3D Printers
MORE: Best Budget 3D Printing
MORE: Best Resin 3D Printers
