Cách 1: Thay đổi tên tài khoản trong Control Panel
Step 1: Truy cập Control Panel/User Accounts and Family Safety/User Accounts.
Step 2: Chọn Change your account name.
![Các cách để thay đổi tên Account trong Windows 10](https://cunghoctin.com/wp-content/uploads/2023/04/choose-change-your-account-name1-edited.png)
Step 3: Type a new name in the box and tap Change Name.
![Các cách để thay đổi tên Account trong Windows 10](https://cunghoctin.com/wp-content/uploads/2023/04/type-name-and-tap-change-name1.png)
Cách 2: Thay đổi tên tài khoản trong Local Users and Groups.
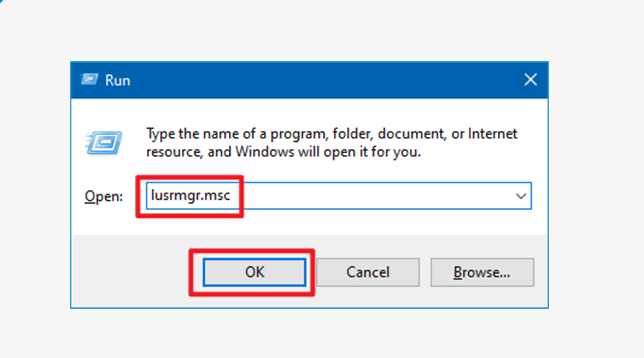
Step 1: Open Run by Windows+R, enter lusrmgr.msc and hit OK to open Local Users and Groups.
![Các cách để thay đổi tên Account trong Windows 10](https://cunghoctin.com/wp-content/uploads/2023/04/open-local-users-and-groups1-e1681744675409.png)
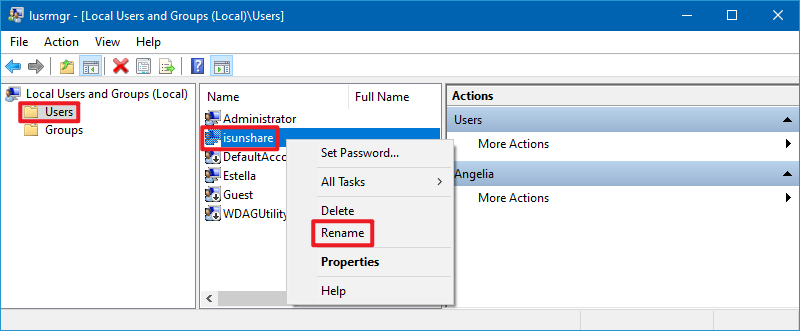
Step 2: Open the Users folder, right-click a user and select Rename in the menu.
![Các cách để thay đổi tên Account trong Windows 10](https://cunghoctin.com/wp-content/uploads/2023/04/go-to-rename-user-account1.png)
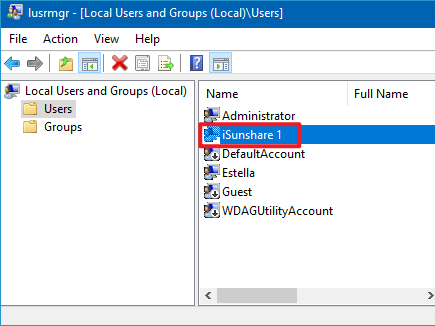
Step 3: Type a new name in the name box.
![Các cách để thay đổi tên Account trong Windows 10](https://cunghoctin.com/wp-content/uploads/2023/04/input-new-name1-edited.png)
Cách 3: Thay đổi quản trị viên hoặc tên khách trong Local Group Policy Editor.
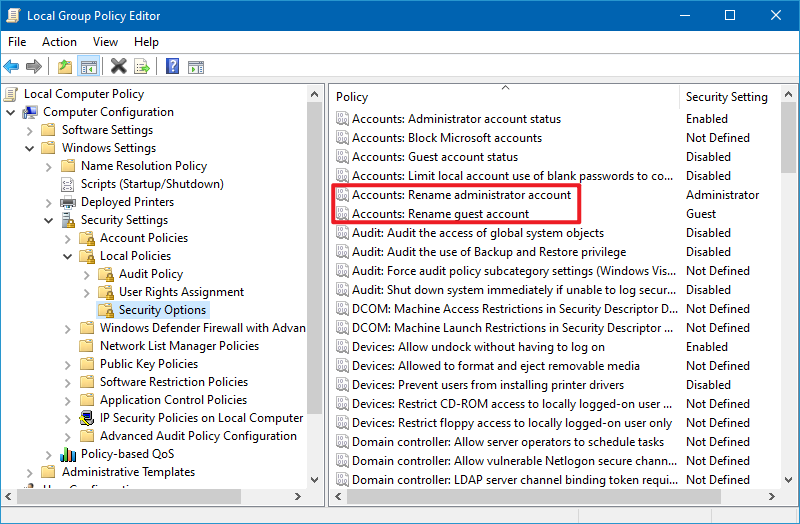
Step 1: Access Local Group Policy Editor.
Step 2: Open Computer Configuration/Windows Settings/Security Settings/Local Policies/Security Options/Accounts: Rename administrator account (or Accounts: Rename guest account).
![Các cách để thay đổi tên Account trong Windows 10](https://cunghoctin.com/wp-content/uploads/2023/04/go-to-rename-administrator-or-guest-account1.png)
Step 3: Type a new name and hit OK.
![Các cách để thay đổi tên Account trong Windows 10](https://cunghoctin.com/wp-content/uploads/2023/04/enter-new-name-and-tap-ok1-edited.png)